


eBook
Related collections and offers
Overview
With its scrumptuous sammies shown on Today and in Woman's Day, the Insanewiches website was chosen by Newsweek as one of "America's Favorite Photo Blogs." Now, blogger Adrian Fiorino goes beyond photos and for the first time serves up 101 wildly original recipes for whipping up your own insanewiches in a snap. Designed with a cool, hip feel and written so you'll LOL, the book contains ‘wiches for every meal (from Sunrisewiches to Dessertwiches), every holiday and occasion (Eventwiches), every pastime (Gamewiches), every personality (Tough Guywiches to ‘Wichy Woman), and every culinary inclination (Supersizewiches, Shapewiches, even OMGwiches). Plus, there's sandwich-engineering tips, recipe variations, utensils to have on hand, serving suggestions, a resource list, and more! Get ready to kick run-of-the-mill meals to the curb with:
.
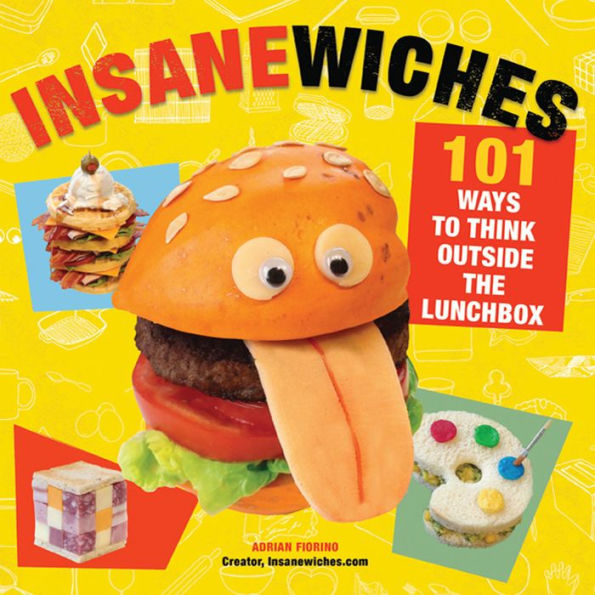
-The Rubix Cubewich---the sandwich that started it all
-The Pancake Popwich---an irresistible breakfast on a stick
-The Sumo Sandwich---a heavyweight that's overstuffed with steak, chicken, salmon, and assorted mushrooms, radish and scallions
-The Pumpkin Cheeseburger and Along Came a Spider---kooky concoctions the kids will love,
-Cosmo Martini Sandwich---made with a cranberry muffin and orange slices, just for the girls.
Overflowing with an array of sandwich varieties---hot, cold, ethnic, vegetarian---Insanewiches is sure to stimulate all senses and taste buds and inspire you to top even the author's craziest creations. So whether you're just bored with lunch or in need of entertaining ideas for the next Super Bowl, Girls' Night In, birthday, or Halloween party, there's a sandwich for every occasion, pastime, or obsession!

Product Details
| ISBN-13: | 9781466871410 |
|---|---|
| Publisher: | St. Martin's Publishing Group |
| Publication date: | 05/13/2014 |
| Sold by: | Macmillan |
| Format: | eBook |
| Pages: | 224 |
| File size: | 34 MB |
| Note: | This product may take a few minutes to download. |
About the Author
Born into food culture and raised on a steady diet of offbeat humor, ADRIAN FIORINO began his highly popular blog, insanewiches.com, in June 2009. He draws inspiration from the most unexpected sources: cell phones, puzzles, power drills, and even sports cars.
Born into food culture and raised on a steady diet of offbeat humor, Adrian Fiorino began his highly popular blog, insanewiches.com, in June 2009. He draws inspiration from the most unexpected sources: cell phones, puzzles, power drills, and even sports cars.
Read an Excerpt
Insanewiches
101 Ways to Think Outside the Lunchbox
By Adrian Fiorino
St. Martin's Press
Copyright © 2011 Adrian FiorinoAll rights reserved.
ISBN: 978-1-4668-7141-0
CHAPTER 1
getting down to bizwich
Before setting foot in the kitchen to create your insanewiches, there are a few things you'll need handy and some stuff you gotta know ...
The Instruments of Insanity
Just like a mad scientist, you'll need the proper tools to concoct your nutty sandwiches. These utensils should be within arm's reach if you hope to exclaim, "It's alive. The sandwich is alive!" Just about every item I mention is probably already lurking in your kitchen drawers or cupboards. The ones that aren't can be found at your local supermarket or online at the sites I provide in the resource list at the end of the book.
No-Brainer Implements:
CUTLERY
Chef's Knife
For about 20 bucks (steer clear of dollar-store cutlery), you can get yourself a high-quality, stainless steel chef's knife that'll last ages. And make sure you keep it sharp, because contrary to what you may have thought, a sharp knife is waaaaay safer than a dull one. If you slice a tomato with a dull chef's knife, you might earn a new nickname: Stumpy.
Bread Knife
Last I checked, most sandwiches (not all) contained bread. Duh! A bread knife, then, is an indispensible tool in your insane sandwich-making arsenal. Bread knives are serrated, so you can't really sharpen them (Please don't try to use a sharpening stone). Find one with a sturdy handle and a moderately flexible blade for maneuverability.
Steak Knife
This is my single most important knife when it comes specifically to insane sandwich bread carving. As you'll learn, a good steak knife works best when you're cutting bread into shapes using a paper template. It offers superior control when etching out tight little curves and turning corners. I never go insanewiching without one.
Paring Knife
Whenever you have fine work that doesn't involve bread, and must be carried out with the hands of a surgeon, your paring knife is tops. Since a paring knife is not serrated like most steak knives, it works great for cutting deli meats and cheeses into shapes or numbers without leaving marks or tears.
UTENSILS & ESSENTIALS
Cutting Board
Unless you've got no qualms about ruining your countertop, get a good, sturdy cutting board. If you choose wood, make sure to get one that's at least ¾ inch thick to help prevent warping and splitting over time. If you go with plastic, try to find one that's not too flexible, in order to keep your cutting surface flat. I own one of each. I break out the plastic board for meats and poultry because it's easier to sanitize; the wood one I use for everything else.
Kitchen Shears
A handy-dandy pair of kitchen shears is indispensible. They're mondo useful for cutting herbs right into a bowl, snipping a toothpick down to size, or even for cutting deli meat and cheese! And of course, I use my kitchen shears to cut out all of the paper templates I use.
Measuring Cups
Have on hand a tempered glass, 1-cup measuring cup for liquids and metal cups of varying sizes for dry ingredients. You may want to buy a 2-cup glass measuring cup for bigger projects.
Spatula
Ya ain't flippin' jack, Jack, if ya ain't got a spatula. Take special care when turning food over, especially if it's cooking in hot oil. I've seen people try to use a fork, or a spoon, or a fork and spoon. Honestly, it's awkward. The safest way is with the right spatula. I like the longer spatulas made from nonstick plastic. I find they offer better control and can be used in both nonstick and stainless steel pans.
Tongs (Not thongs, that's another book. Not my book, someone else's.)
I have two pairs (one metal and one plastic) to accommodate almost any situation. I use the metal ones for stainless steel cookware and the plastic to avoid chipping my nonstick pan. A good pair of tongs is like an extension of your arm. You can easily pick up hot items or handle raw meat. And I use them for mixing salads and for stirring pasta when it's boiling in water.
Vegetable Peeler
Whenever I need long strips of vegetable (like carrot or cucumber), I use my vegetable peeler. I prefer a straight hand-held peeler with rubberized handle for a firm grip. This variety offers better control and safety, compared to Y-type peelers with a metal or hard plastic handle.
Cheese Grater
The obvious use for a cheese grater is, well, grating cheese. No surprises there. But it also comes in very handy when a recipe calls for room-temperature butter and all you've got is refrigerated or frozen. (Yeah, I routinely forget to take butter out of the fridge before I start cooking). In that case, just grate the cold butter right into the pan, pot, or bowl and it will soften in no time.
Whisk
When I'm motivated enough to make a made-from-scratch pancake batter, I always use a whisk to ensure the mixture is lump-free. Some commercial whisks can get pretty huge, but for the home cook, a hand-held kind that's between 10 and 12 inches long will do just fine.
Food Processor
Yes, I am one of those crazy cooks who enjoys cutting stuff into a fine dice by hand. But when there just isn't the time, I break out the food processor. The one I own is a compact, 25-dollar countertop unit with one simple blade attachment and one speed. The container is 4 inches in diameter and almost 3 inches deep. It's ideal for making dressing, salsa, egg salads, and pestos. Since the recipes in this book don't require you to process large quantities or difficult-to-work-with ingredients, you won't need a processor that's big and fancy. But if you have one, great!
Strainer
True, they look like fencing masks, but they're also pretty useful when you gotta drain liquids or rinse veggies under the tap. A good, all-purpose-size strainer for sandwich making is about 7 or 8 inches in diameter. And a medium-fine mesh will do the trick for most kitchen tasks. Just make sure you wash yours immediately after use; otherwise food gets stuck in the mesh, which, quite frankly, is kinda nasty.
Colander
They're handy for draining pasta and for rinsing larger quantities of food. And here's a tip in case you don't have a strainer. Double-line the colander with some cheese cloth so that the holes won't allow smaller bits to pass through.
COOKWARE
Cast-Iron Skillet
A cast iron skillet is good for slapstick comedy, but it's also incredibly versatile in the kitchen. I use mine to sauté onions and make pancakes and frittatas, and I love that I can take it from stovetop to oven with no problems.
Cast-Iron Grill Pan
As the cast iron skillet's ridged cousin, the grill pan will allow you to cook meat and other items indoors, but still achieve that barbecue taste and char. Almost nothing's better than fixing a juicy seared steak with lovely grill marks on it in December. And it's a cinch to do: just heat the pan on your stovetop or in your oven using high heat, oil and grill away. Just remember, if you're in a smaller space, open some windows while you grill so you don't set off the fire alarm (yes, I learned that the hard way!).
Nonstick Fry Pan
Eggs, and grilled cheese almost always start off in my trusty nonstick. It's easy to clean and if you're cooking healthy, you can get away with using little oil. But never use metal utensils, 'cuz some of the coating could chip off and end up in your food. Sure, there are some brands that advertise "safe for use with metal implements," but I'm still skeptical.
Baking Sheet
Whenever I've got a bunch of smaller items or one fairly large, flat item to cook, I reach for the old baking sheet. The one I own is about 16 by 12 inches in size and has a nonstick coating. Just make sure not to use yours under the broiler, which could cause it to warp.
Sauce Pan and Stock Pot
Make sure they're stainless steel and heavy-bottomed to conduct heat evenly. Each should have its own lid and sturdy construction.
NOT-SO-OBVIOUS APPARATUSES
Assorted Cookie Cutters
Bread cuts just as easily (or easier) than cookie dough. Having an assortment of miscellaneous cookie cutters on hand (you name it, I've used it) will allow you to stamp out all sorts of funky bread shapes with zero effort. For your insanewiches, you'll need:
• A set of rounds (sizes ranging from 2 inches in diameter to 5 ½ inches)
• A set of stars (the smallest is roughly silver-dollar sized; the largest, the size of your palm)
• Two squares (2 ¾ inches and 3 inches, respectively)
• Large heart, small heart
• Club shape
• Diamond shape
• Spade shape
• Hand shape, foot shape
• Christmas tree shape
• Fish shape
Edible Markers
Need a really small ace of diamonds? Draw it in. Need to put dots on dice-shaped sandwiches? Scribe them on. With edible markers, getting that fine detail work done is a snap. They're available from cake supply companies, some major grocers, and online from the site recommended in my resource list.
Toothpicks and Skewers
When purchasing toothpicks, make sure they're decent quality. The last thing you want is a splinter left behind in your sandwich. And yes, size does matter, so use a toothpick that's the right length for the job. It's gotta be long enough to penetrate all the layers of bread, cheese, veg, and meat.
Edible Glues
Relax people, no one's asking you to down a tube of super glue. Many of the sandwiches in this book have little bits and pieces attached to them with mustard or decorating gel. And if these fail, you can always make a bit of homemade glue with one part water and one part flour (Remember your childhood papier maché-making days?).
Apple Corer
It's not just for apples, ya know. Whenever I need to make a small circle out of cheese, bread or meat, I can always count on my apple corer. You can stamp out several rounds in quick succession or just as easily make holes in an ingredient.
Parchment Paper
Several of the funky sandwich shapes and designs from this book start with a parchment paper template. Why parchment paper? It's real easy to trace shapes with because it's translucent, and it's a cinch to cut with kitchen shears. Find out how to make parchment paper templates.
Ruler
When it comes to making a perfectly straight line, I have no qualms about breaking out the old schoolhouse ruler. Buy one for sandwich making only and store it separately. You wouldn't want any pencil shavings or bits of eraser stuck to your cucumber.
Ziploc ® Bags
Sometimes you'll need to pipe mayonnaise or mashed sweet potato onto a sandwich like it's vanilla frosting. In that case, a large Ziploc bag works as well as anything you'll find in an expensive cake supply store. I show you how to use a Ziploc bag for piping.
Shop 'Til Ya Dropwich!
As a sandwich maker on a mission, check these ingredients off your grocery list while you make a mad dash through the aisles.
FOR THE FRIDGE:
Mayonnaise
You can use it plain, sure. But mayonnaise is a great base for so many awesome flavors. Add lemon, dried chipotle or ancho chile powder, cumin, smoked paprika, curry powder, wasabi horseradish, regular horseradish, or minced garlic and you've got more than just plain-old mayo — you've got an über condiment that'll kick yer sammy up a notch!
Assorted Mustards
At any given time, you'll find no less than four different mustards in my fridge door. Today, for example, the selection includes: honey mustard, honey-Dijon, grainy, and, of course, yellow. The honey mustards offer a sweet contrast to sandwiches containing salty meats and cheeses. The yellow adds a savory accent. Grainy mustard is great for providing texture. (I love it when those itty-bitty grains pop in my mouth!)
Salted Butter
The old saying, "Everything's better with butter", is pretty much true. If I'm not using olive oil, there's a pretty good chance you'll find butter somewhere in the recipe. It adds an unmistakable richness to sautéed onions or mushrooms and combines well with minced garlic. I say, if yer gonna have butter, have it and enjoy it.
Eggs
Eggs are quite arguably the galaxy's most versatile food. Boiled, fried, scrambled — there are so many delicious incarnations. All cooks (crazy or sane) need this staple food in their fridge — unless, of course, they are allergic. If that's the case, stay the heck away from them.
Pickles
When I've completed an insanewich, I often enjoy it with a zesty pickle on the side. Many will disagree, but I actually consider pickles (maybe four or six of them at a time) a side dish. There I said it. I always have several kinds at the back of my fridge — kosher dills, half sours, and baby dills, to name a few.
Jams and Jellies
You'll notice a variety of jams and jellies inside the breakfast and dessert sandwiches — and maybe even in a savory sandwich (See The Fool's Gold Loaf). I never run low on my faves, which include pear, orange, blueberry, and grape.
FOR THE PANTRY:
Olive Oil
What can I say? I'm Italian! So I always gotta have olive oil close by. While the top-quality, cold-pressed, extra-virgin stuff isn't great for high-temperature frying (use canola or safflower oil, which has a higher smoke point), it sure works well for light sautés and most certainly in spreads or on salads.
Nut Butters
Peanut butter is great stuff, but don't feel like you have to limit yourself. Try other tasty nut butters, such as almond and cashew, to experiment with different flavors in your sweet insanewiches.
Food Coloring
I use food coloring in some pretty bizarre ways in this book. I manage to incorporate it with eggs, French toast, and even mayonnaise! When your sandwich needs some more visual appeal, food coloring is often the way to go.
Assorted Seasonings
Apart from salt and pepper, my go-to seasonings are ancho chile, chile powder, chipotle chile, cinnamon, cumin, curry powder, dry mustard, nutmeg, and paprika. I list them for you alphabetically because that's how they're arranged on my spice rack. Yes, I'm mildly OCD that way.
Decorating Gel
When I'm embellishing sweet sandwiches (See the hour hands on The Donut Alarm Clock), these handy little tubes of colored sugar and water make life real easy. Instead of cutting a feature out of food, I can just draw it on.
The Unique Techniques for Building An Insanewich
Follow these tips and tricks as sandwich gospel. It's the only surefire way to end up with a weird 'wich and to show the world you've got a couple of loose screws!
BREAD CARVING WITH TEMPLATES
While flipping through the pages of this book at the bookstore (by the way, thanks for buying it!), you no doubt wondered how the heck you're gonna make some of these crazy sandwich shapes. Not to worry, the work's already done for you. By using the templates that accompany several of the recipes, you can carve out crazy bread shapes in a snap. Here's the process:
1. Place parchment paper over the pre-made template.
2. Trace the template using an edible marker.
3. Cut the template out with kitchen shears.
4. Stack the slices of bread on a cutting board and place the template on top. NOTE:If you find that the parchment paper you're using flips or curls up (which would make it awkward to carve the shape), simply retrace the parchment paper cutout onto a regular sheet of white paper, cut that template out and use the white paper shape instead. This is the extra step I took to demonstrate this technique.
5. Holding your steak knife vertically, cut into the bread crust until you reach the template.
6. Follow the template using a very small sawing motion with the steak knife until you've reached the starting point.
7. Pull away the excess bread and the shape is complete.
Tips:
• Do not move the sandwich when you need to turn a sharp corner with the knife; instead, move the entire cutting board.
• Hold the paper template with your non-cutting hand if it begins to shift.
You can use this same technique to carve shapes out of cheese, thicker slices of meat, potato or almost anything else you use as "bread." But in those cases, use a paring knife instead of a steak knife (which is serrated) to avoid tearing and shredding.
CUTTING BREAD WITH A COOKIE CUTTER
Sometimes you won't need a template if the sandwich design is based on shapes that can be formed with a cookie cutter. Here's how to properly execute:
1. Place the bread slice on a cutting board and center the cookie cutter on the slice of bread.
2. In one motion, press firmly using the whole palm of your hand.
3. When you've hit the chopping board, slightly wriggle the cutter to ensure the bread is cut through and the shape is completely free.
4. Gently release the shape from the cutter using your fingers.
(Continues...)
Excerpted from Insanewiches by Adrian Fiorino. Copyright © 2011 Adrian Fiorino. Excerpted by permission of St. Martin's Press.
All rights reserved. No part of this excerpt may be reproduced or reprinted without permission in writing from the publisher.
Excerpts are provided by Dial-A-Book Inc. solely for the personal use of visitors to this web site.
Table of Contents
Contents
Thank Yous,The First Slice,
1 Getting Down to Bizwich,
2 Sunrisewiches,
3 Gamewiches,
4 Tough Guywiches,
5 'Wichy Woman,
6 Supersizewiches,
7 Shapewiches,
8 OMGwiches,
9 Eventwiches,
10 Dessertwiches,
Resources,