


Bead Jewelry 101: Master Basic Skills and Techniques Easily Through Step-by-Step Instruction
200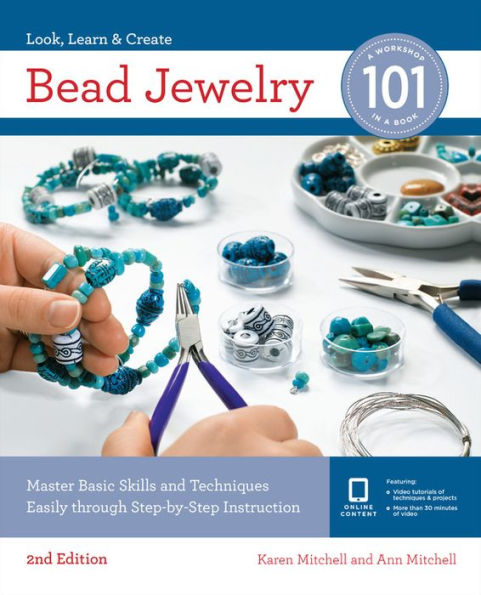
Bead Jewelry 101: Master Basic Skills and Techniques Easily Through Step-by-Step Instruction
200Paperback(Reprint)
-
PICK UP IN STORECheck Availability at Nearby Stores
Available within 2 business hours
Related collections and offers
Overview
- A world of beautiful beads, including metal, pearl, plastic, polymer clay, stone, shell, and wood.
- Approachable techniques for beading, wire work, and stringing that will boost your jewelry-making skills.
- A wide variety of jewelry styles: sophisticated, playful, chic, bohemian, and modern.
- Troubleshooting tips and quick references

Product Details
| ISBN-13: | 9781631597596 |
|---|---|
| Publisher: | Quarry Books |
| Publication date: | 09/03/2019 |
| Series: | 101 Series |
| Edition description: | Reprint |
| Pages: | 200 |
| Sales rank: | 313,077 |
| Product dimensions: | 7.40(w) x 9.20(h) x 0.60(d) |
About the Author
Ann Mitchell is part of a dynamic sister team with Karen Mitchell, with a costume jewelry company called AnKara Designs based in Altadena, California. Ann and Karen make and sell jewelry and teach jewelry making classes nationwide. They also contribute articles on jewelry making to several magazines and participate in many noted arts and crafts shows annually. www.ankaradesigns.com
Read an Excerpt
CHAPTER 1
The Basics
Making bead jewelry is a very creative, enjoyable craft but, as with most crafts, you can become frustrated if you don't know which tools and materials to buy and how to use them. Manufacturers can't include all the vital information with their packaging, and there are so many options for materials, tools, and techniques. To give you a firm foundation for learning to make bead jewelry, this section teaches you the essentials about tools, findings, accessories, and beads and shows you all of the basic construction techniques you will use for the projects. If you have never tried making jewelry before, you will appreciate the detailed information and photos. Even if you have a little experience making bead jewelry, you are sure to learn some things you didn't know. So settle back, take your time, and explore the basics.
How to Begin
Jewelry making is fun, though with the myriad supplies available, getting started can be confusing or overwhelming. This chapter breaks down how to approach your new interest so that you will enjoy it and not get in over your head with findings and beads before understanding how to organize your ideas and your supplies. You will learn about how to set up a workspace, what tools you will need for most projects, and how to store and organize your supplies. In addition, an outline of design considerations will assist you in choosing your next project.
Where do you start? Before you go to the bead store, think about the space you will be working in. You will need a few basic items:
• A table or other flat surface with enough space to plan your designs
• A comfortable chair at the right height for your worktable
• A light to see what you are working on
• Storage space for beads and findings
Once you have established a work area (which can be portable), you should think about the types of jewelry you would like to make in regard to style and materials. Prior to the bead and findings purchasing trip (to the store or on the Internet), you may want to do a little research by perusing books, magazines, and Web sites for ideas so that you know where you want to start. This book focuses on basic styles constructed with beads of varied sizes and shapes combined with the most commonly used jewelry findings, such as headpins, eye pins, jump rings, beading cable, wire, chain, memory wire, filigree, and additional stringing materials. There is also a chapter on recycling, reusing, and repurposing jewelry parts and beads. The results are attractive, wearable styles that are attainable even to those new to jewelry making. There are also ideas for more advanced jewelry makers. If you are unfamiliar with any of the findings listed, you will find them explained in greater detail in the photographic glossary beginning on page 12.
With a slightly better idea of what you want to make, you will need to purchase a basic set of tools. Here are the most commonly used tools for making bead jewelry, those that you will use for most of the projects in this book:
• Chain-nose pliers — make sure you try them out for the size, shape, and comfort in your hand
• Round-nose pliers
• Wire cutters
• Ruler
• String for measuring necklace, bracelet, and anklet lengths
• Towel, bead mat, or piece of felt to keep beads from rolling on your work surface
• Storage containers for beads and findings
When shopping for tools, purchase good quality items, as you will use them frequently. In addition to this tool selection, there are some other items that will be helpful to you for specific projects:
• Crimp pliers for stringing on beading cable or monofilament
• Scissors, a good all-purpose tool
• Heavy-duty wire cutters for cutting memory wire, which will ruin small cutters
• Bead board with built-in grooves with rulers, compartments for beads, and a flocked surface, which holds beads in place, making necklace and bracelet design much easier
• A second pair of chain-nose pliers, especially helpful for jump ring projects
• Tweezers, which not only are helpful for picking up small beads, but also are very useful for knotting beading thread between beads
• Jump ring tool, which is another good option for closing jump rings
• Knotting tool for knotting thread between beads or as decorative elements on projects
You will need storage boxes. Beads are often small and round and apt to roll into inconvenient places. Choose storage boxes carefully, making sure they have dividers that are fused to the bottom of the box and are not removable. As tempting as it may be to purchase boxes with adjustable compartments, you will be glad later that you did not. Over time the dividers slip, and small beads and parts will sneak into other sections. Unless you really enjoy re-sorting, think twice about adjustable dividers. Also look for boxes that have grooves in the lid of the box that snap over the dividers so that if the box is closed and gets turned upside down, everything stays in place. As you do more jewelry making, you will find the best way to organize and store your beads and findings in a system that works for you.
Consider storing your beads separately from your findings. You may sort your beads by color, style, or size. Again, you will figure out what works best for you as you start to make more jewelry.
Once you have picked out your workspace and made the initial purchase of tools, you are ready to shop for beads and findings. With an idea of what pictured, so take into account any adjustments you anticipate. If you are purchasing beads randomly to make a variation on a design, you may want to have a few extras for lengthening the design or making matching earrings. Items such as beading wire, crimp beads, clasps, and jump rings can be purchased in larger quantities and used in future projects. Selecting a project from a book, magazine, or Web site is a good way to start, so you'll know exactly what you need. Just make sure that you read through the entire project supply list and instructions before purchasing anything. Once in the bead store, stay focused on your project. Immediately after making your purchases, it is a good idea to sort your findings and beads into storage containers before starting the project.
How do you decide what styles you want to make for yourself? Think about what styles of clothing you wear, the shapes of the necklines, whether you wear more prints or solids, and what length of necklace or earring best suits your body type and the shape of your face. Think about whether you prefer detailed, ornate pieces, bold and chunky accessories, or something simple. All of these factors will help you determine the style of jewelry you will make.
A few design principles and elements that will come into play while you are designing are:
Balance and scale. This relates to the overall balance of the piece, the balance and scale of the individual elements, and the elements as they relate to you and the outfit you are wearing.
Texture and detail. You should determine if you like a lot of texture, small details, or large-scale elements with texture, and whether you like your jewelry smooth, matte, or shiny.
Repetition. You can create visual interest through repetition of color, elements, or patterns.
Color. Think about how your design coordinates with an outfit, how a color or group of colors looks on you, how colors work together, and if you have chosen too many colors for one design.
Comfort and wearability. It is important to consider both the comfort and functionality of a piece of jewelry, and how you can best achieve that with- out compromising design. Here are a few specifics:
• Earrings. Avoid styles that are noisy or overly heavy.
• Bracelets. Delicate or fragile parts may get knocked off.
• Necklaces. If they are heavy, lumpy, or too long, they could get hooked on countertops or other structures.
• Anklets. If they are too long, they can get caught in sandal straps. You should also avoid beads that make them too lumpy or abrasive.
In addition, necklaces, bracelets, and anklets come in standardized lengths, but may not be the right length for you. Lengths will vary depending on body type, personal preference, neckline, and size of beads and components. The wonderful thing about making your own jewelry is that you can customize it for yourself.
There are many considerations in jewelry design. When people think of jewelry making, often the first picture in their head is of a beaded necklace. So why does this book start with headpins and other findings, instead of starting with a simple beaded necklace strung on beading wire? Because the techniques learned with the findings form some of the basic elements for earrings and for embellishments on other beaded items. This book presents a progression of findings, and projects that explore their use. The projects in later chapters incorporate the materials and techniques you learned about in earlier chapters. This book will guide you through the basic parts, tools, and techniques for bead jewelry making. The rest is up to you, so have a good time!
Photographic Glossary
In this section, many of the materials you will encounter while crafting beaded jewelry are listed alphabetically under these headings: Tools, Findings, Accessories, and Beads. Look to this section for detailed descriptions and photographs of materials.
Tools
BEAD BOARDS
Bead boards are flat and have graduated calibrated beading channels and recessed storage areas. Used to lay out and plan bead designs and organize beads and findings, most boards are flocked to prevent objects from rolling.
BEADING NEEDLES
Beading needles are available in flexible wire or stiff metal and used to guide beads onto a bead cord that does not come with an attached needle. Use collapsible eye needles with beads that have very small holes.
BEAD REAMERS
Bead reamers have long diamond grit covered tips, are used for enlarging and smoothing out holes in beads. Also available in a battery-operated version.
JUMP RING TOOL
Jump ring tool is a ring designed to fit over a finger with two different sized slots on top. Jump rings can be fitted into one of the slots and the tool is twisted to open and close the jump rings. Slots are different sizes to accommodate various sizes of jump rings.
KNOTTING TOOL
Knotting tool has a pin with a Y-shaped prong next to it and is used to form tight knots between beads strung on silk or nylon bead cord.
PLIERS AND WIRE CUTTERS
Pliers and wire cutters are each designed for a special purpose.
Chain-nose pliers, also known as flat nose pliers, have a fine nose with double half-round tips and are used to form loops and other configurations in wire, close bead tips, open and close jump rings, flatten crimps, and attach findings. The flat interior of the nose will not mar wire if used gently.
Crimp pliers are used to close and secure crimp beads and tubes. The inner position on the pliers forms a groove and the outer position rounds the crimp, making it smooth and comfortable. Pliers are available in different sizes to coordinate with different sizes of crimp tubes.
Nylon-tipped, flat-jawed pliers are used to help shape coated wire without marking the wire. They are also used to straighten wire before use by lightly pulling the wire through the pliers.
Round-nose pliers, tapered and slim with double-round tips, are used for looping and shaping wire into curves. Combination flat/round tipped pliers are also available for making sharp bends in wire, uniform loops, and jump rings.
Split ring pliers have one straight tip and one tip with a small hook on the end. They are used to separate split rings and keep them separated in order to attach other findings.
Heavy-duty wire cutters cut heavy wire gauges and steel wire such as memory wire. Memory wire can also be cut with memory wire shears.
Wire cutters are used to cut beading wires, small gauge wires, coated wire, and other soft wire. These cutters are not for use on heavy gauge wire or memory wire.
STORAGE CONTAINERS
Storage containers in which to store beads and findings are available in many types. Boxes with sections work well — look for those with attached dividers and lids that close snugly over the sections in order to avoid accidental mixing of beads and parts.
STRAIGHT TWEEZERS
Straight tweezers with long narrow tapered tips are used to help slide knots snugly next to each bead strung on silk or nylon bead cord. Tweezers can also be used to pick up small beads and crimp beads.
WIRE JIG
Wire jig has a metal or plastic base with evenly spaced holes. Pegs of different sizes are placed in the holes to form a pattern and wire is wound around the pegs to make a loop or finding to be used in a jewelry design.
WORK SURFACES
Work surfaces are bead mats made of foam to keep beads and findings from rolling around. Towels or felt pieces can also be used as work surfaces.
Findings
"Findings" is a generic term for components used to assemble jewelry.
BAILS
Bails made of metal are attached to a bead then clipped or slid onto chain or cord to form a pendant attachment. Pinch bails fold over to form the attachment loop for the chain and can be squeezed together so that the pointed ends on each end of the bail fit into holes of a tip-drilled or side-drilled bead.
BARRETTES
Barrettes are flat metal hair clip bases that are available in a number of sizes up to four inches (10 cm). French made clips are superior in quality.
BEAD CORD
Bead cord is thin cord of silk or nylon designed specifically for stringing beads. Short lengths are available with an attached needle. Often used to string beads with knots in between, different diameter cord is used for different sizes of beads.
BEADING CABLE OR FLEXIBLE BEADING WIRE
Beading cable or flexible beading wire is composed of tiny metal wires that are twisted together and coated with nylon. The greater the number of strands, the more flexible the cable. Beading cable is available in different diameters; smaller diameters are appropriate for smaller beads, peyote stitch, and bead weaving, and large heavier beads require larger diameter wire. There are also a variety of metals and colors available.
CELL PHONE STRAPS
Cell phone straps are thin straps with a loop on the end which can be attached through the hole on a cell phone or PDA. An assortment of decorative elements can be attached to the loop.
CHAINS
Chains consist of a series of joined loops and/or connectors. Some of the types of chains available are as follows:
Bar chain has flat, round or decorative bars connected with small loops.
Curb chain has same-size loops that interlock and twist so that all the loops are parallel to each other and the chain lies flat.
Figaro chain is made in a pattern of a smaller oval loop or loops followed by a larger loop.
Loop and connector chain has flat connectors between the loops.
CHOKER CLAMPS OR RIBBON CLAMPS
Choker clamps or ribbon clamps are fold-over rectangular flat clamps that can be squeezed together around a ribbon end, finishing the end. Clasps or other findings can be attached to the loop on the clamp. Clamps have grips to hold the ribbon, but should be glued as well.
CLAMSHELL ENDS
Clamshell ends are similar in shape to a clam and can be placed over the knot at the end of strung bead cord or silk. Use chain nose pliers to close the clamshell over the knot, covering it. The attached loop on the clam-shell end can be used to attach a clasp or other jewelry findings.
CLASPS
Clasps come in a wide range of styles:
Barrel or torpedo shaped clasps have two sides that screw together. Loops on the ends of the clasp components spin freely, allowing the two sides to be screwed together without twisting the jewelry piece.
Box and tongue or filigree (pearl) clasps have a flat folded side or tongue that fits into a box-shaped side. The tongue side acts as a spring that holds the two sides together. These clasps are available with various numbers of attached loops for creating multi-strand designs. A pearl clasp has a tongue that hooks as well for added safety.
(Continues…)
Excerpted from "Bead Jewelry 101"
by .
Copyright © 2019 Quarto Publishing Group USA Inc..
Excerpted by permission of The Quarto Group.
All rights reserved. No part of this excerpt may be reproduced or reprinted without permission in writing from the publisher.
Excerpts are provided by Dial-A-Book Inc. solely for the personal use of visitors to this web site.
Table of Contents
How to Use This Book 4
The Basics 6
How to Begin 8
Photographic Glossary 12
Construction Techniques 32
The Projects 40
Headpins 42
Basic Drop Earrings 42
Multi-drop Necklace 43
Beaded Cluster Bracelet 54
Eye Pins 60
Segmented Anklet 60
Double Triangle Earrings 66
Textured Segmented Necklace 72
Jump Rings 80
Interlocking Jump Ring Earrings 80
Jump Ring and Bead Necklace 86
Jump Ring Lace Bracelet 92
Beading Cable 98
Teardrop Leaf Earrings 98
Long Beaded Necklace 104
Woven Bracelet with Pearls 110
Wire 116
Chandelier Earrings 116
Wrapped Shell Pendant 122
Wired Bangle 126
Chain 130
Tassel Pendant 130
Draped Chain Earrings 134
Chain Mesh Bracelet 140
Memory Wire 146
Triple-looped Earrings 146
Heart Choker 150
Memory Wire Bracelet 154
Filigree 158
Layered Filigree Post Earrings 158
Filigree and Bead Bracelet 162
Embellished Filigree Brooch 166
Other Stringing Materials 172
Basic Knotted Bracelet 172
Elastic Bracelet 178
Illusion Necklace 182
Recycle, Reuse, and Repurpose 186
Recycled Bead Drop Earrings 186
Reuse Bracelet 190
Repurposed Necklace 194
Resources 198
Index 199
Related Subjects
Customer Reviews
Explore More Items


