

Beginner's Book of Modular Origami Polyhedra: The Platonic Solids
64
Beginner's Book of Modular Origami Polyhedra: The Platonic Solids
64eBook
Related collections and offers
Overview
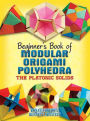
These 17 projects are based on the classic Platonic solids: the tetrahedron, hexahedron, octahedron, dodecahedron, and icosahedron. Folders at every level of experience, from absolute beginners to old hands, will appreciate the step-by-step diagrams and their detailed views of the models' assembly. Additional helpful features include photos of the complete models, background on the Platonic solids, and references.

Product Details
| ISBN-13: | 9780486132181 |
|---|---|
| Publisher: | Dover Publications |
| Publication date: | 02/08/2012 |
| Series: | Dover Crafts: Origami & Papercrafts |
| Sold by: | Barnes & Noble |
| Format: | eBook |
| Pages: | 64 |
| File size: | 5 MB |
| Age Range: | 12 - 18 Years |
Read an Excerpt
BEGINNER'S BOOK OF MODULAR ORIGAMI POLYHEDRA
THE PLATONIC SOLIDS
By Rona Gurkewitz, Bennett Arnstein
Dover Publications, Inc.
Copyright © 2008 Dover Publications, Inc.All rights reserved.
ISBN: 978-0-486-13218-1
CHAPTER 1
PLATONIC SOLIDS
Tetrahedron 4 triangle faces 6 edges 4 vertices dual: tetrahedron
Cube 6 square faces 12 edges 8 vertices dual: octahedron
Icosahedron 20 triangle faces 30 edges 12 vertices dual: dodecahedron
Octahedron 8 triangle faces 12 edges 6 vertices dual: cube
Dodecahedron 12 pentagon faces 30 edges 20 vertices dual: icosahedron
BACKGROUND
1. What is modular origami?
Modular origami is origami made from several sheets of paper that have been folded into modules, also called units. The modules are usually identically folded but may be of several types. The modules are assembled into models that most often are patterned after the 3D geometric shapes called polyhedra.
2. What is the connection between modular origami and polyhedra?
Underlying most 3D modular origami is a uniform, convex polyhedral shape. The modules in the model are in positions corresponding to either the faces, edges or corners (vertices) of the polyhedral shape. Convex polyhedra don't have spikes. Uniform polyhedra have all of their corners having the same arrangement of shapes around them. For example, there are three squares meeting at each corner of a cube. So the more you know about polyhedra, the more modular origami shapes you can make.
3. What is a polyhedron?
A 3D polyhedron is a shape made up of polygons for sides, where a polygon is a shape made up of line segments connected in a row, such as a triangle or a square.
4. What are the Platonic Solids?
The Platonic Solids are five convex polyhedra that have been known since the time of Plato, the cube, the tetrahedron, the octahedron, the dodecahedron and the icosahedron, pictured on p iv. Each of these polyhedra has all of its faces the same regular polygon which means also that all of its edges are the same length. It can be shown that these are the only five geometric shapes with these properties. In addition, their vertices all lie on a sphere.
5. A short history of the relevance of the Platonic Solids
In Plato's times the Platonic solids were equated with the following elements: tetrahedron-fire; cube-earth; octahedron-air; icosahedron-water and dodecahedron-universe. In the 1600s, Johannes Kepler used them as a basis for his system of astronomy. During the Renaissance artists used them as the subject of their art to better understand perspective. Starting in the 1800s polyhedra were used as models for crystal structures. Haeckel in the 1800s drew pictures of radiolaria which have icosahedral shape. In the 20th century virus coats were found to be icosahedral, fullerenes are molecules based on other polyhedral shapes, scientists used nanotechnology to build molecules of polyhedral shapes. Many 20th century artists and sculptors incorporated polyhedra into their work.
1. Cromwell, Peter; Polyhedra; Cambridge University Press, 1997
2. Fuse; Unit Polyhedron Origami, Japan Publications, 2006
3. Fuse; Unit Origami, Japan Publications, 1990
4. Gurkewitz and Arnstein, 3D Geometric Origami: Modular Polyhedra; DoverPublications, 1996
5. Gurkewitz and Arnstein, Multimodular Origami Polyhedra: Archimedeans, Buckyballs and Duality, Dover Publications, 2003
6. Kawamura; Polyhedron Origami for Beginners, Japan Publications, 2002
7. Mitchell; Mathematical Origami; Tarquin Publications, 1997
8. Montroll; Constellation of Origami Polyhedra; Dover Publications, 2004
9. Montroll; A Plethora of Polyhedra in Origami; Dover Publications, 2002
10. Mukerji; Marvelous Modular Origami; AKPeters, 2007
11. Simon, Arnstein and Gurkewitz; Modular Origami Polyhedra; Dover Publications, 1999
12. Wenninger, Magnus; Polyhedron Models; Cambridge University Press, 1970
LINKS
Krystyna Burczyk www1.zetosa.com.pl/burczyk/origami/galery1-en.htm
George Hart www.georgehart.com/
Tom Hull www.merrimack.edu/~thull/
David Mitchell www.origamiheaven.com
Jeannine Mosely world.std.com/~j9/sponge/
Meenakshi Mukerji home.comcast.net/~meenaks/origami
Mette Pederson mette.pederson.com/
David Petty members.aol.com/ukpetd/
James Plank www.cs.utk.edu/~plank/plank/origami/origami.html
Francis Ow web.singnet.com.sg/~owrigami/
Eric Weisstein mathworld.wolfram.com/origami.html
Magnus Wenninger employees.csbsju.edu/mwenninger/
Joseph Wu www.origami.as/home.html
ORIGAMI SOCIETIES
British Origami Society www.britishorigami.info
Origami-USA www.origami-usa.org/
MAKING THE MODELS
DEFINITION OF SYMBOLS
[ILLUSTRATION OMITTED] Valley crease, points down
[ILLUSTRATION OMITTED] Mountain crease, points up
[ILLUSTRATION OMITTED] Fold a valley crease
[ILLUSTRATION OMITTED] Unfold
[ILLUSTRATION OMITTED] Fold a valley crease and unfold
[ILLUSTRATION OMITTED] Fold away from you, making a mountain crease
[ILLUSTRATION OMITTED] Unfold a mountain crease
[ILLUSTRATION OMITTED] Repeat once
[ILLUSTRATION OMITTED] Repeat on the back
[ILLUSTRATION OMITTED] Repeat three times
[ILLUSTRATION OMITTED] Turn over
[ILLUSTRATION OMITTED] Apply pressure here
[ILLUSTRATION OMITTED] The next figure shows what this eye sees
[ILLUSTRATION OMITTED] Inside reverse sink here, or just push in
[ILLUSTRATION OMITTED] Hidden line
[ILLUSTRATION OMITTED] The crease passes through the point
[ILLUSTRATION OMITTED] Cut along this line
WATERBOMB OR TRIANGLE BASE
Start with a square in diamond position. Fold the bottom point to the top point.
Unfold.
Fold the right point to the left point. Unfold.
Turn the model over.
Fold the bottom edge to the top edge. Unfold.
Fold the right edge to the left edge. Unfold.
Push in at the center of each edge. The model will become three dimensional.
Top view of model. The next step is viewed from below.
Bottom view of model.
HOW TO MAKE AN EQUILATERAL TRIANGLE FROM A SQUARE
Fold the bottom edge to the top edge. Unfold.
Fold upper left corner to crease with new crease starting at lower left corner.
Step 2 completed. Turn model over.
Repeat step 2.
The equilateral triangle is finished. Cut it out and discard the shaded portion.
HOW TO MAKE AN EQUILATERAL TRIANGLE FROM A LETTER-SIZE RECTANGLE
Start with short edge on top. Fold right edge to left edge. Unfold.
Fold lower right corner to center crease with new crease going to lower left corner.
Fold right edge to crease made in step 2. Unfold.
One big triangle finished. Cut it out and discard the shaded portion.
HOW TO MAKE AN EQUILATERAL TRIANGLE SIX HALF-SIZE TRIANGLES FROM A RECTANGLE:
Start with step 4 of triangle from a letter sized rectangle.
Fold the lower left corner to the center crease with the new crease going to the lower right corner. Unfold.
Fold the upper part of the left edge to the crease made in step 6. Unfold.
Six half-size triangles finished. Cut out the triangles and discard the shaded portions.
HOW TO MAKE A HEXAGON FROM A SQUARE
Crease a square into four equal spaces, horizontally and vertically.
Fold each corner to the nearest vertical crease. Unfold.
Make two creases through the points indicated.
Step 3 complete.
The hexagon is finished. Cut it out and discard the shaded portion.
MAKING A HEXAGON FROM A LETTER SIZE RECTANGLE
Crease the rectangle into four equal spaces.
Fold the lower right corner to the first vertical crease with new crease starting a center of bottom edge. Unfold.
Fold right edge to crease from last step. Unfold.
Fold top of left edge to crease from last step. Unfold.
Model so far. Turn model over.
Repeat steps 2-5 on this side of the paper.
Paper so far.
The hexagon is finished. Cut it out and discard the shaded parts of the paper.
CUBES
THE JACKSON CUBE
by Paul Jackson
Six modules can be assembled to form a cube. The modules are folded from squares. A good color combination is three colors, squares of the same color on opposite sides of the cube
All the modules are folded the same way. Fold the upper edge down to approximately the center of the square. There is no exact location. There is no center crease because it would show on the finished model. See next step for how to estimate the location of the fold.
Ideally, the width of the folded portion, distance "A", should be half the width of the remaining portion, distance "B". Any distance will be ok though.
Fold the lower edge up to meet the new location of the original upper edge.
There is no exact location for the next crease for the same reason as before. Fold the left edge approximately to the center. See the next step for how to estimate the location of the crease.
Estimate the width of the folded portion to be half the width of the unfolded portion; or estimate the unfolded portion to be a square. Fold the right edge up against the original left edge, forming a cupboard-door fold.
Unfold the cupboard-doors so they stick straight out from the central portion.
The module is finished. Make six, two of each of three colors. Opposite sides of the cube will be the same color.
The central portion is called a face. The cupboard-doors are called tabs.
Start by placing a second-color module face down on a level surface.
Insert the bottom tab of a first-color module between the tabs of the second-color module.
Insert a third-color module so its face covers the rear tab of the second-color module, and its rear tab goes between the tabs of the first-color module.
Insert the other first-color module opposite the existing one, with its bottom tab going between the tabs of the second-color module, and its face covering the left tab of the third-color module.
Insert the other third-color module opposite the existing one, with each tab going between the tabs of a first-color module, and its face covering the front tab of the second-color module.
Insert the remaining second-color module so that each tab goes between the tabs of one third-color module, and its face covers the upper tabs of the first-color modules.
The cube is finished.
SONOBE CUBE
by Mitsunobu Sonobe
Fold bottom edge to top and unfold
Fold bottom and top edges to center crease and unfold
Fold bottom right corner to first horizontal crease and unfold.
Completed fold.
Fold bottom edge to center crease.
Fold lower left edge diagonally to top crease.
Completed fold. Rotate.
Fold lower right corner to first folded edge.
Fold bottom edge up along the existing crease.
Fold lower left corner to upper right corner and unfold.
Refold along the existing crease, slipping the lower left corner under the top layer.
Turn over.
Fold lower left corner to upper left corner and unfold.
Fold upper right corner to lower right corner and unfold.
Turn over.
Completed module. Make 6.
Insert tab of second module into pocket of first module.
Complete.
The third module completes one corner of the cube by connecting to each of the first two modules.
Step 19 complete.
The next piece is placed opposite the other piece of the same color. Each new piece must complete a corner of the cube by attaching to two existing pieces
Attach the fifth piece by following the instructions of step 21. This piece will complete two corners of the cube, one corner at a time.
After the fifth piece has been attached, there will be only one open face remaining on the cube. There will also be two tabs on the cube on two opposite edges of the open face. Place the last piece under and between these two tabs. The last piece will form the remaining four corners of the cube, as it covers the open face.
Completed Sonobe Cube.
TILE CUBE
Traditional
The Tile Cube is made from six square tiles, connected by twelve square connectors. Each tile is made from two 2 x 1 rectangles, and each connector is half the size of the 2 x 1 rectangle used to make the tiles. All the pieces needed to make one cube can be made from nine squares as follows: cut six of the squares in half to make twelve 2 x 1 rectangles; then cut each of the remaining three squares into four half-size squares to make the twelve connectors.
Fold the left edge to somewhere near the center, making the upper and lower edges line up. You could pinch a crease on the upper or lower edge to mark the exact center, or you could make a mark with a pen or pencil, by eye, to approximately locate the center, or you could estimate by eye when the folded portion is approximately half the width of the unfolded single-layer portion, or when the unfolded single-layer portion appears to be a square.
Place a second rectangle with its long edges vertical under the folded portion of the first rectangle. Place the second rectangle snugly against the crease in the first rectangle. Wrap the short right edge of the first rectangle around the long right edge of the second rectangle.
Turn the model over. Wrap the second rectangle forward around the first rectangle.
Separate the two modules.
Turn one module so its creases are horizontal. Then turn it so its cupboard-door folds face the other module.
Join the modules by placing the cupboard-doors of each module inside the cupboard-doors of the other.
Two cupboard-door folded modules have been assembled to form one square tile. Note that there is an opening on each edge into which a connector may be inserted.
Make six tiles.
Make one crease in the center of the connector. Make twelve connectors.
Insert a connector into the opening in the edge of a tile, until the crease in the center of the connector touches the edge of the tile.
A connector has been inserted into the first tile.
Grasp and squeeze the first tile at the location shown by the heavy circle, and insert the exposed end of the connector into the opening in the edge of the second tile until the two tiles touch.
Two tiles have been connected. One-half of the connector has been inserted into each tile.
Add a third tile, making two connections: one between the third and first tiles, and one between the third and second tiles. At each connection, first insert the connector half-way into one tile, then insert the other half into the other tile.
Next add a fourth tile, opposite the second tile, and the same color as the second. Two more connections are needed to add the fourth tile.
Add a bottom tile, the same color as the top tile. Three connections are needed to add the bottom tile.
Add the last tile opposite the first tile. Make it the same color as the first tile. Four connections are needed to add the last tile.
CUBE WITH WINDOWS
Simplification of Lewis Simon's "Decoration Box".
by Bennett Arnstein
Start with a two by one rectangle, long edge on top. Fold the bottom edge to the top edge and unfold.
Fold the top and bottom edges to the center crease.
Module after step 2.
Module viewed from side.
Module after step 2. Turn it over.
Fold the lower left corner to the upper folded edge.
Module after step 4. Rotate model 180 degrees.
Repeat step 4 on the lower left corner.
The crease line runs from the corner on the lower edge to the corner on the upper edge.
Unfold the crease made in step 6.
Fold the lower left corner and edge to the diagonal folded edge.
Turn the module over.
Repeat steps 8 - 10 at the left end of the module.
The module is finished. Unfold to step 3. Make twelve modules.
Note tabs and pockets on finished module.
Connect two modules by partially closing the mountain creases to right angles, and inserting a tab on the second module into a pocket on the first module.
Two modules have been connected. The short crease on the entering module lines up with the long crease on the receiving module.
Three modules have been connected. A tab on the third is inserted into a pocket on the second, and a tab on the first is inserted into a pocket on the third.
This forms one corner of the cube.
Add two more modules to the end of one of the first three modules to form a second corner of the cube. Always complete a 3-module corner after it has been started because the three modules hold themselves together.
Continue adding modules to the built-up assembly, forming one corner of the cube at a time, until one face of the cube has been completed. Then turn the assembly upside-down with the completed face on the bottom.
With the completed face on the bottom finish the remaining four corners, one corner at a time.
The Cube with Windows is finished.
(Continues...)
Excerpted from BEGINNER'S BOOK OF MODULAR ORIGAMI POLYHEDRA by Rona Gurkewitz, Bennett Arnstein. Copyright © 2008 Dover Publications, Inc.. Excerpted by permission of Dover Publications, Inc..
All rights reserved. No part of this excerpt may be reproduced or reprinted without permission in writing from the publisher.
Excerpts are provided by Dial-A-Book Inc. solely for the personal use of visitors to this web site.