


Handknit Holidays: Knitting Year-Round for Christmas, Hanukkah, and Winter Solstice
184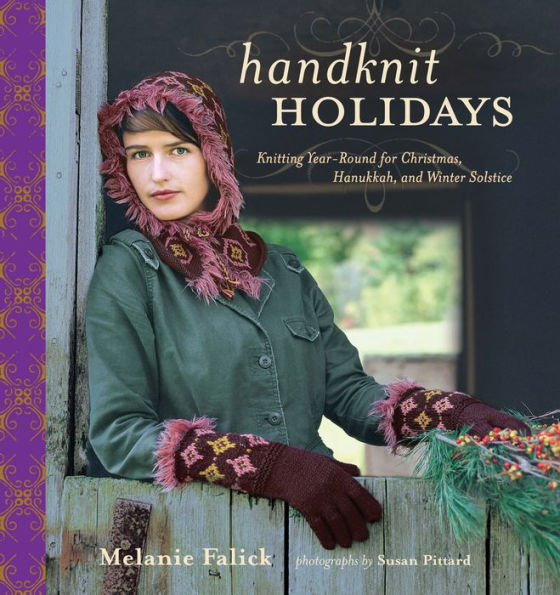
Handknit Holidays: Knitting Year-Round for Christmas, Hanukkah, and Winter Solstice
184eBookDigital Original (Digital Original)
Related collections and offers
Overview
Created by top knitwear designers, the projects include colorful ornaments; funky and classic Christmas stockings; a wire-and-bead menorah; sparkly ribbon scarves; a poncho and matching dog sweater; and a range of super-quick projects for that last-minute holiday rush, from a Santa hat, to elf caps, to flower pins. Rounding out the volume are a few grand projects—an Aran tree skirt, a patchwork afghan, a lace shawl—destined to become family heirlooms, plus features on such topics as the origin of the Christmas stocking, the meaning of the winter solstice, knitting for charities, strategies for finishing holiday knitting (on schedule!), and even a delicious recipe for festive crescent cookies.
Beautifully photographed by Susan Pittard, Handknit Holidays is a creative celebration of the holiday season and a treasure for all knitters who seek to bring more of their own handwork—and artistry—into their daily lives and their holiday festivities.
Melanie Falick, publishing director of STC Craft, is the author of Weekend Knitting, Knit: A Personal Handbook, and Knitting for Baby (with Kristin Nicholas) (all STC), plus Kids Knitting and Knitting in America—with more than 400,000 books in print. She lives in Dutchess County, NY.
Susan Pittard is a lifestyle and portrait photographer based in New York City. Her work has appeared in numerous publications, including Lucky and Rowan Knitting & Crochet Magazine.

Product Details
| ISBN-13: | 9781453268162 |
|---|---|
| Publisher: | ABRAMS, Inc. |
| Publication date: | 04/01/2022 |
| Sold by: | Barnes & Noble |
| Format: | eBook |
| Pages: | 184 |
| Sales rank: | 629,823 |
| File size: | 37 MB |
| Note: | This product may take a few minutes to download. |
About the Author
Read an Excerpt
Handknit Holidays
By Melanie Falick, Betty Christiansen
ABRAMS
Copyright © 2005 Melanie FalickAll rights reserved.
ISBN: 978-1-4532-6816-2
CHAPTER 1
DECK THE HALLS
Designs for the Home
The tradition of decorating a tree for Christmas is universal, though every culture has its own twist. In Scandinavia, ornaments may be woven from straw; Eastern Europe is famous for handpainted eggs; and those in Japan who decorate Christmas trees do so with tiny fans, paper lanterns, and origami swans. Here, Leigh Radford uses wool. In one version, her ornaments are simple balls knit in solid colors or stripes (see left). In the other, colored fleece is felted into small balls that are joined and embellished in myriad ways—even strung together into a garland (see pages 14 and 15).
Knitted Ornaments
FINISHED MEASUREMENTS
Small (Large): Approximately 3 (4 ¼)" diameter
YARN
Harrisville Highland Style (100% wool; 200 yards / 100 grams): 1 skein each #4 gold, #17 Bermuda blue, #16 teal blue, #22 plum, #7 tundra (gold/green), #48 dove gray, #38 teak (brown)
NEEDLES
One set of five double-pointed needles (dpn) size US 7 (4.5 mm)
Change needle size if necessary to obtain correct gauge.
NOTIONS
Crochet hook size F/5 (3.75 mm) Polyester batting, yarn needle
GAUGE
24 sts and 28 rows = 4" (10 cm) in Stockinette stitch (St st)
CO 12 (20) sts; distribute sts evenly over 4 needles—3 (5) sts each needle.
Join for working in the rnd, being careful not to twist sts; place marker (pm) for beginning of rnd.
Bottom
Rnd 1: Knit.
Rnd 2: [K1-f/b, knit across to last st on needle, k1-f/b] 4 times—20 (28) sts.
Repeat Rnds 1 and 2 until there are 11 (15) sts on each needle—44 (60) sts.
Work even for 5 (9) rnds.
Top
Rnd 1: [Skp, knit across to last 2 sts on needle, k2tog] 4 times—36 (52) sts remain.
Rnd 2: Knit.
Repeat Rnds 1 and 2 until 3 (5) sts remain on each needle, end after completing Rnd 2—12 (20) sts remain.
Break yarn, leaving an 18" tail. With tail threaded onto yarn needle, slip sts onto tail—DO NOT gather at this point.
Finishing
Using CO tail threaded on yarn needle, weave yarn through CO edge; gently pull to gather closed. Weave in end securely on WS. Stuff ornament with batting. Gather live sts at BO edge and gently pull to close opening. Using BO tail and crochet hook, work a 4 ½" chain; fasten off, leaving a tail for attaching chain to ball. Secure end of chain to top of ornament to form a loop. Embellish ornaments with embroidery if desired.
Note: Work ornaments in solid colors or in stripes, as desired.
FINISHED MEASUREMENTS
Small (Large): approximately ½ (1)" diameter
FLEECE
Harrisville Fleece (100% wool): 1 ounce each #4 gold, #17 Bermuda blue, #16 teal blue, #22 plum, #7 tundra, #45 dove gray, #38 teak, #8 hemlock
MATERIALS
Felting needle (available at yarn stores and from Harrisville Design; see Sources for Supplies, page 184)
Pan or tub for water, dishwashing soap, rubber gloves with textured palms (for friction and faster felting)
Leather lacing—18 feet or desired length for garland; 8–10" for each ornament Yarn needle, sequin pins, seed beads—size 11 or smaller works best (bead must be small enough not to slip off the head of the pin), craft glue
Solid-Color Felt Balls
Working close to a sink, fill pan or tub with a couple inches of very hot, soapy water. Select a small section of fleece in desired color—filling the palm of your hand. Put on rubber gloves, tear fleece into small sections, and begin to roll the pieces together in a circular fashion between your palms. Dip the fleece into the hot, soapy water and continue to roll the now wet fleece in your hands, adding additional pieces of torn fleece if you would like to increase the size of the ball. Occasionally run your ball under very cold water—the "shock" of switching the fleece from hot to cold increases the speed with which it will felt. Continue to roll the ball between your palms until it reaches its desired smoothness and size. If felting time is slowing down, use hotter water and/or more soap.
Multicolored Felt Balls
Follow felting instructions above until ball is partially felted. Once the shape of the ball is formed, choose contrasting color(s) (CC), dampen in the soap and water, and place in the desired position on the partially felted ball. Using the felting needle, with a gentle stabbing motion, secure the fleece into place. (Note: Felting needles are very sharp and have a barbed point; the barbed point helps to stick the fleece together.) Continue stabbing until the CC is tacked into place in desired shape, then continue felting as above until the ball has reached desired smoothness and size.
Finishing
Beaded Embellishment: Coat a short pin with a bit of glue, then slip seed bead onto pin and insert into felt ball in desired location.
Ornaments: Using 8–10" of leather threaded onto yarn needle, insert needle up through one or more felted balls, then back down through in the opposite direction, leaving a 2 ½" loop at the top. Secure leather by knotting both ends at the base of the ornament. Embellish as desired.
Garland: Thread leather onto yarn needle; string felted balls onto leather, spacing them approximately 2 ½" apart; tie a knot on either side of each ball to secure in place.
AMANDA BLAIR BROWN
Pompom Garland
Weave a magic web around your Christmas tree with these glittery, whimsical, and very original garlands made from knitted I-cords braided together and then dotted with playful pompoms. The cords can be made any length, and the pompoms are removable, making it easy to experiment until you find just the right way to mix and match them.
YARN
Classic Elite Waterspun (100% felted merino wool; 138 yards / 50 grams): 3 or 4 colors of choice, or as indicated below for each Garland Note: 10 yards yarn will make approx 2 feet I-cord.
Classic Elite La Gran Mohair (76.5% mohair / 17.5% wool / 6% nylon; 90 yards / 42 grams): 1 ball makes approximately 8 solid-color pompoms; also used with gold cord for wrapping braids
Metallic cord (sold at craft/paper stores): 1 roll each thin gold and silver cord for wrapping braids and making shimmering pompoms
SHOWN IN THE FOLLOWING COLORS:Note: Numbers beginning with 5 are for Waterspun; numbers beginning with 6 are for La Gran.
PINK GARLAND (OPPOSITE): #5068 madder (brick), #5019 India pink, #5089 Julia's pink (light pink), and #5087 bisque (tan); wrapped with #6519 cameo (light) pink and gold cord.
GREEN GARLAND (PAGE 23): #5035 fern green (olive), #5074 pastoral green (yellowish green), #5036 celery (light green); wrapped with #6539 eucalyptus green and gold cord.
NEEDLES
Two double-pointed needles (dpn) size US 7 (4.5 mm) for I-cord
NOTIONS
10 large safety pins, yarn needle, 2 pieces cardboard, each 4" square for pompoms
GAUGE
Not crucial for this project
Garland
I-Cords
Using Waterspun, make 3 or 4 15-foot (or desired length) 4-stitch I-cords for each strand of garland (see Special Techniques, page 177). Note: The finished garland will be slightly shorter than the length of each I-cord.
Pompoms
Using La Gran and Waterspun, make 15 pompoms, each approximately 4" in diameter, in colors desired (see Special Techniques, page 178). Mix and match yarn colors and fibers for interesting effects. Mix in gold and silver cord for extra shine.
Finishing
Tie 3 or 4 I-cords together at one end. With a safety pin, attach tied end to a stationary object. Loosely braid I-cords together, securing at 3-foot intervals with safety pins; tie I-cord ends together. Note: Instructions for making a 4-strand braid appear on page 171.
Wrap Garland: Cut 2 strands of La Gran and gold cord each 20 feet in length; holding one strand of each color together, tie ends to one end of the braid; loosely wrap strands around the braid, making a full wrap every 6"; tie strands to the other end of the braid. With remaining strands threaded onto yarn needle, tie ends to one end of the braid; loosely wrap strands around the braid in the opposite direction, making a full wrap every 6"; tie strands to opposite end of the braid. Remove safety pins.
Attach Pompoms: Attach 13 pompoms, evenly spaced, along the length of the garland by bringing pompom ends around each side of braid and knotting tightly; tie remaining 2 pompoms onto each end of garland. Trim pompom ties.
The yarns used for this jolly set of stockings come from La Lana Wools of Taos, New Mexico, where Sandy Cushman loves to visit at all times of the year. Here, she has tried to capture the subtle palette of the landscape in that part of the country in both color and texture—the hardscrabble desert, the verdant mountains, and the sunshine that makes everything brighter and warmer, especially in winter. The vibrant, earthy colors she has chosen are repeated in the batik-print lining sewn inside each stocking, another reminder that holiday celebrations in many parts of the world—including much of the United States—are often anything but red and green.
FINISHED MEASUREMENTS
Approximately 20 (22, 24, 26, 28)" long
YARN
YARN 1: La Lana Knitting Worsted (100% wool; 200 yards / 4 ounces): grape (A), apple green (B), and burgundy (C)
YARN 2: La Lana Forever Random Blends (wool / mohair blends; 80 yards / 2 ounces): Chaco Canyon (D), yellow brick road (E), faerie queen (F), and primavera (G)
Note: Each Stocking will use 2 ½–3 skeins yarn, depending on the size of Stocking; mix and match colors as desired, or work as shown.
NEEDLES
One 16" circular needle size US 9 (5.5 mm)
One set of five 6" double-pointed needles (dpn) size US 9 (5.5 mm)
One set of five 8" double-pointed needles size US 9 (5.5 mm)
Change needle size if necessary to obtain correct gauge.
NOTIONS
45" wide lining fabric: ½ yard for Stockings 1 and 2; 3/4 yard for Stockings 3 and 4;" yard for Stocking 5; 5 pieces ? yard ribbon, each 12" long, for hanger loops; waste yarn
GAUGE
Approximately 17 ½ sts and 17 ½ rows = 4" (10 cm) in Slip stitch pattern from Chart using Yarns 1 and 2
17 sts and 22 rows = 4" (10 cm) in Stockinette stitch (St st) using Yarn 1
Note: Gauge within stocking is variable due to character of yarn and Stitch patterns.
SHOWN IN THE FOLLOWING COLORS/SIZES:
STOCKING 1: 20" long in Slip st pattern, using B and G for toe, foot, and leg; A and F for Ribbed Top and Heel.
STOCKING 2: 22" long in Stripe pattern, using C, F and G for toe, foot, and leg; A for ribbed Top and Heel.
STOCKING 3: 24" long in Slip st pattern, using A and E for toe, foot, and leg; C for ribbed Top and Heel.
STOCKING 4: 26" long in Stripe pattern, using B and A for toe, foot, and leg; F for ribbed Top and Heel.
STOCKING 5: 28" long in Slip st pattern, using D and C for toe, foot, and leg; A and B for ribbed Top and Heel.
NOTES
• These stockings are knit from the toe up to the Ribbed Top, with only a short pause to insert waste yarn where the future heel will be. For ease in working, change from dpn to circ needle when sufficient sts have been increased.
• When working Slip st pattern, strand yarn loosely behind slipped sts to prevent fabric from puckering.
• Slip Stitch Pattern
(multiple of 8 sts; 24-rnd repeat) Note: See Chart for color placement. Rnds 1 and 2: * Slip 1, k7; repeat from * around. Rnds 3 and 4: * K1, slip 1, k5, slip 1; repeat from * around. Rnds 5 and 6: * Slip 1, k1, slip 1, k3, slip 1, k1; repeat from * around. Rnds 7 and 8: Repeat Rnds 3 and 4. Rnds 9 and 10: Repeat Rnds 1 and 2. Rnds 11 and 12: Knit. Rnds 13 and 14: K4, * slip 1, K7; repeat to last 4 sts, slip 1, k3. Rnds 15 and 16: K3, * slip 1, k1, slip 1, k5; repeat to last 5 sts, slip 1, k1, slip 1, k2. Rnds 17 and 18: K2, * slip 1, k1, slip 1, k1, slip 1, k3; repeat to last 6 sts, slip 1, k1, slip 1, k1, slip 1, k1. Rnds 19 and 20: Repeat Rnds 15 and 16. Rnds 21 and 22: Repeat Rnds 13 and 14. Rnds 23 and 24: Knit. Repeat Rnds 1–24 for Slip st pattern.
• Make Bobble (mb)
Knit in [front, back, front] of next st to increase to 3 sts, turn; p3, turn; pass first st over second st, pass second st over third st to decrease to one st.
• BOBBLE BO All Stockings: K1, * mb, pass first st over bobble to BO 1 st, knit bobble st (pulling to tighten bobble); k1, pass bobble st over knit st, [p1, pass last st over st] 2 times, k1, pass last st over st; rep from * around.
General Instructions (All Stockings)
Toe Flap
Using 2 dpns and B (C, E, B, D), CO 6 (6, 6, 6, 8) sts; begin St st. Work even for 11 (11, 11, 13, 15) rows; DO NOT TURN. Rotate work to pick up and knit 8 (8, 8, 10, 12) sts along side with Needle 2; rotate to pick up and knit 6 (6, 6, 6, 8) sts across bottom (CO edge) with Needle 3; rotate to pick up and knit 8 (8, 8, 10, 12) sts along other side with Needle 4; then k2 (2, 2, 2, 3) sts from Needle 1 with Needle 4. Join for working in the rnd. Knit 1 rnd, distributing sts evenly on four needles—7 (7, 7, 8, 10) sts on each needle; place marker (pm) for beginning of rnd—28 (28, 28, 32, 40) sts.
Toe
Rnd 1—Increase rnd: * K1, M1, knit to end of Needle 1; knit to 2 sts from end of Needle 2, M1, k1; repeat from * for Needles 3 and 4.
Rnd 2: Knit even.
Repeat Rnds 1 and 2 until there are 12 (13, 14, 15, 16) sts on each needl e—48 (52, 56, 60, 64) sts total.
SLIP STITCH STOCKINGS
Stockings 1 (3, 5)
Foot: Join G (E, C); begin Slip st pattern and Chart. Repeating Rnds 1–24 of stitch pattern, work 35 (47, 59) rnds, ending Rnd 11 (23, 11) of stitch pattern.
Mark for Heel: Using waste yarn, knit across Needles 1 and 2, turn; purl across Needles 2 and 1.
Leg: Continuing as established, work Rnd(s) 12–24 (24, 12–24) of Slip st pattern once, then repeat Rnds 1–24 of Chart 2 (3, 3) times—61 (73, 85) rnds.
STRIPED STOCKINGS
Stocking 2: 3-Color Stripe Sequence
Begin St st.
Foot: Join F; work 3-color Stripe sequence [2 rnds F, 2 rnds G, 2 rnds C] 6 times, ending last repeat with 1 rnd C—35 rnds.
Mark for Heel: Using waste yarn, knit across Needles 1 and 2, turn; purl across Needles 2 and 1.
Leg: Beginning with 1 rnd C, repeat 3-color Stripe sequence 8 more times—49 rnds.
Stocking 4: 2-Color Stripe Sequence
Begin St st.
Foot: Join A; work 2-color Stripe sequence [2 rnds A, 2 rnds B] 11 times, ending last repeat with 1 rnd B—43 rnds.
Mark for Heel: Using waste yarn, knit across Needles 1 and 2, turn; purl across Needles 2 and 1.
Leg: Beginning with 1 rnd B, repeat 2-color Stripe sequence 17 more times—69 rnds.
ALL STOCKINGS
Ribbed Top
Join A (A, C, F, A); knit 1 rnd even. Increase Rnd: * K1, M1, k1, p2; repeat from * around—60 (65, 70, 75, 80) sts. Ribbing: Work in k3, p2 rib as established until Ribbed Top measures 2 ½" , using colors as follows:
Stocking 1: Join F; alternate 2 rnds A, 2 rnds F for length.
Stockings 2, 3, and 4: Cont with color established.
Stocking 5: Join E; alternate 2 rnds A, 2 rnds E for length.
BO all sts using Bobble BO.
Heel
Carefully remove waste yarn and place sts from top and bottom of heel opening on 2 needles. Pick up an extra st at the end of each needle—52 (56, 60, 64, 68) sts total. Divide sts evenly onto 4 needles; join A (A, C, F, A). Rnd 1—Decrease Rnd: * K1, k2tog, knit to end of Needle 1; knit to last 3 sts on Needle 2, ssk, k1; repeat from * for Needles 3 and 4. Rnd 2: Knit even. Working heel in same color(s) as for Ribbed Top, repeat Rnds 1 and 2 until there are 4 (4, 4, 5, 5) sts remaining on each needle. Slip sts from Needle 2 onto Needle 1 and sts from Needle 3 onto Needle 4; graft sts together using Kitchener st (see Special Techniques, page 178). Weave in ends.
Lining
Fold lining fabric in half with RS's together. Place completed Stocking (with Ribbed Top folded down as in photo) on fabric and carefully trace around Stocking. Cut fabric along tracing, cutting ½" larger than tracing along top edge of Stocking. Using ½" seam allowance, with RS's together, sew lining, leaving top open. Fold top edge ½" down to WS and press. Fold one 12" long piece of ribbon in half. Turn lining RS out and stitch lining to inside top edge of Stocking, securing ribbon in between center back of Stocking and lining. Tack lining to heel and Toe.
(Continues...)
Excerpted from Handknit Holidays by Melanie Falick, Betty Christiansen. Copyright © 2005 Melanie Falick. Excerpted by permission of ABRAMS.
All rights reserved. No part of this excerpt may be reproduced or reprinted without permission in writing from the publisher.
Excerpts are provided by Dial-A-Book Inc. solely for the personal use of visitors to this web site.
Table of Contents
Contents
8 Introduction,11 Deck the Halls Designs for the Home,
65 Warming Up Hats, Scarves, Mittens, Gloves, and Socks,
107 Dressing Up Sweaters, Shawls, and Party Hats,
153 Packing Up Carryalls, Gift Bags, and Last-Minute Gifts,
176 special techniques,
182 contributors,
184 sources for supplies,
185 acknowledgments,
186 index,