

eBook
Related collections and offers
Overview
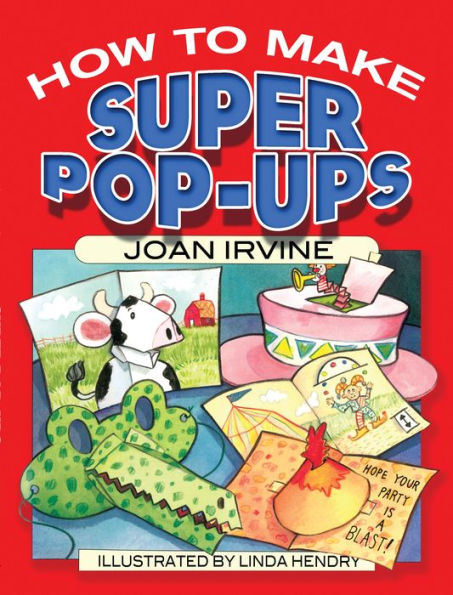
The easy-to-follow directions explain how to transform greeting cards, school assignments, and birthday gifts from two dimensions to three with just a little glue and tape. More than 475 illustrations appear with simple instructions for double cutting, attaching bases and sliding strips, and other practical methods. Great for kids ages 8 and up, these techniques can also be used to create more sophisticated patterns, including stage props and centerpieces. Children, parents, teachers, and paper crafters of all ages will adore this treasury of imaginative and fun-filled projects.

Product Details
| ISBN-13: | 9780486318233 |
|---|---|
| Publisher: | Dover Publications |
| Publication date: | 03/12/2013 |
| Series: | Dover Origami Papercraft |
| Sold by: | Barnes & Noble |
| Format: | eBook |
| Pages: | 96 |
| File size: | 6 MB |
Read an Excerpt
How To Make Super Pop-Ups
By Joan Irvinem, Linda Hendry
Dover Publications, Inc.
Copyright © 1992 Joan IrvineAll rights reserved.
ISBN: 978-0-486-31823-3
CHAPTER 1
Part One Super Cutting
Would you like to make a flying bird or perhaps an amazing lizard? In Part One, you'll learn special cutting techniques to make these pop-ups and many more.
Super cutting involves cutting, folding and pushing shapes through to the other side of your paper. You'll also discover a new cutting technique called double-cutting. Or try a super pop-up idea that uses three layers of paper instead of two.
In Part One, you'll find many new ways to make creatures and animals. You'll even learn how to make a dragon that will turn into a bird when you flip it upside-down!
Tips
• After you fold your paper in half, always cut on the folded edge.
• After you cut your paper, make firm folds by going over the fold line with your thumb and index finger.
• It is easier to push your cut shape through to the other side if you hold your paper like a tent.
• If you close your paper and press firmly, the cut shape will remain pushed through to the other side of the paper.
• When you glue the inside and outside papers together, apply glue only to the outer edges of the inside paper.
• Never apply glue near the pop-up shape.
• Making one or more triangle folds on a beak or mouth part will give you some really interesting shapes.
• Design your own pop-ups. Make different cuts on the folded edge of a piece of paper, then fold and push the shapes through to the other side.
Make a Birthday Cake
Try double-cutting to make a really super pop-up.
1 Take two pieces of paper, each 21.5 cm x 28 cm (8½ in. x 11 in.). Fold each paper in half. Put one paper aside.
2 On the folded edge of the other paper, mark two dots, each one 4.5 cm (1¾ in.) from the ends.
3 Starting at the dots, draw two parallel lines towards the other edge of the paper. Each line should be 2.5 cm (1 in.) long.
4 Cut the lines, starting from the folded edge.
5 Fold the cut strip forward and then fold it back to its original position.
6 Open your paper and hold it like a tent. Push the strip down in the opposite direction of the fold, so that it is pushed through to the other side of your paper. Close the paper and press firmly. Open to see the pop-up strip.
7 Close your paper. On the folded edge of the pop-up strip, mark two dots, each one 2 cm (¾ in.) from the ends.
8 Starting at the dots, draw two parallel lines towards the other edge of the paper. Each line should be 2 cm (¾ in.) long. Starting from the folded edge, cut the lines, being careful to cut through only the top fold of your paper. Do not cut through both folded edges of the pop-up strip.
9 Fold the cut strip forward and then fold it back to its original position. Open your paper and push the strip down and through to the other side of your paper. Close the paper and press firmly. Open to see the second pop-up strip.
10 Close your paper. On the folded edge of the last pop-up strip, mark two dots, each one 1.6 cm (5/8 in.) from the ends.
11 Starting at the dots, draw two parallel X lines towards the other edge of the paper. Each line should be 1.2 cm (½ in.) long.
12 Cut the lines, starting from the folded edge. Again, do not cut through both folded edges of the pop-up strip. Fold the strip forward and then fold it back to its original position.
13 Open your paper and push the strip down and through to the other side of your paper. Close the paper and press firmly. Open to see the third pop-up strip.
14 Close your paper. On the folded edge of the last pop-up strip, mark two dots, each one 1.6 cm (5/8 in.) from the ends.
15 Starting at the dots, draw two parallel lines towards the other edge of the paper. Each line should be .6 cm (¼ in.) long.
16 Cut the lines as you've done for the other pop-up strips. Fold the strip forward and then fold it back to its original position. Push the strip down and through to the other side of the paper. Close the paper and press firmly. Open to see the fourth pop-up strip.
17 To make the candles for your cake, take a piece of heavy white paper. Draw, colour and cut out the candles.
18 Apply glue to the back of each candle at the bottom. Glue the candles to the front edge of the folded layers of the cake.
19 Now apply glue to the back of your paper. Glue it to the paper you put aside, which now becomes the outside paper. Do not apply glue in the area of the birthday cake.
20 Decorate the inside and outside papers.
Other Ideas
Castle
By adding doors, windows and towers with flags, you can make a castle.
Ship
Make a ship by adding portholes, a flag and waves.
Make a Lizard with Amazing Eyes
1 Take two pieces of paper, each 21.5 cm x 28 cm (8½ in 11 in.). Fold each paper in half. Put one aside.
2 Place the other paper so that the folded edge is on your left. Mark a dot 8 cm (3 1/8 in.) from the bottom of the paper.
3 From this dot, draw a 6 cm (2¼ in.) diagonal line towards the top right-hand corner of the paper.
4 Cut the line, starting at the folded edge.
5 Fold the flap back to form a triangle.
6 Fold the flap forward to its original position. Open your paper and hold it like a tent. Put your finger on the tip of the cut shape and push down in the opposite direction of the fold. Then pinch the two folded edges of the shape, so that the shape is pushed through to the other side of the paper. Close the paper and press firmly.
7 When you open your paper and look inside, you will see the pop-up snout of a lizard.
8 To make the amazing eyes, close the paper. On the upper folded edge of the pop-up snout, mark two dots, each one 1 cm (3/8 in.) from the ends.
9 Starting at the dots, draw two parallel lines 1 cm (3/8 in.) long.
10 Cut the two lines, cutting through both folded edges of the pop-up snout.
11 Fold just the top strip back and then fold it forward to its original position.
12 Open your paper and push the strip down and through to the other side. Close your paper.
13 Turn to the other side of your paper. Fold the cut strip back and then fold it forward to its original position.
14 Open your paper and push the strip down and through to the other side. You will now have a pair of eyes.
15 Close your paper. On the folded edge of one of the eyes, mark two dots, each one 1 cm (3/8 in.) from the ends.
16 Starting at the dots, draw two parallel lines 1 cm (3/8 in.) long.
17 Cut the lines, starting from the folded edge. Be careful to cut through only the top fold.
18 Fold the cut strip back and then fold it forward to its original position. Push the strip down and through to the other side.
19 Turn paper over and repeat steps 15 to 18 on this side of it. Open your paper and you will have two amazing eyes.
20 Glue paper circles to the eyes. Draw and colour a lizard's body around the pop-up face.
21 Apply glue to the back of your paper. Glue it to the paper you put aside, which now becomes the outside paper. Do not apply glue in the area of the eyes or snout.
22 Decorate the inside and outside papers.
Other Ideas
A Different Snout
Close your paper slightly, then reach inside it and fold the tip of the snout to.one side, as shown. Fold the tip back to its original position then push down on it to create an extra fold on the snout. The fold makes the snout point down.
Bird
Follow the directions for "A Different Snout" and draw a bird's head around the pop-up shape.
Make a Catcher's Mask
With this complex cutting technique, you can make pop-ups inside pop-ups.
1 Take two different coloured pieces of heavy paper, each 21.5 cm x 28 cm (8½ in. x 11 in.). Fold each paper in half. Put one aside.
2 On the folded edge of the other paper, mark two dots, each one 4 cm (1½ in.) from the ends.
3 Starting at the dots, draw two large curved lines. The curved lines should go no further than 6 cm (2¼ in.) from the folded edge.
4 Under the top curved line, draw five more curved lines, each about 1 cm (3/8 in.) apart.
5 Starting above the bottom curved line, draw five more curved lines. There will now be six top curved lines and six bottom curved lines. The lines should not touch each other.
6 Cut all of the lines, starting from the folded edge.
7 Fold the middle section to the right. Remove this section by cutting along the fold line.
8 Fold to the right the second and fourth strips in the top section and bottom section, as shown.
9 Cut out the strips that have been folded back.
10 Fold the entire inside section forward. Fold it back to its original position.
11 Open your paper and hold it like a tent. Push the cut section down in the opposite direction of the fold, so that the bars are pushed through to the other side of your paper. Close your paper with the cut section inside and press firmly. Open your paper. The mask will stand out.
12 Take the paper that you put aside. Place it under the mask and with a pencil, lightly mark the areas for eyes, a nose and a mouth.
13 Remove the pop-up mask and put it aside. On the other sheet of paper, draw and colour eyes, a nose and a mouth at the marked places. You can also add hair and an outline for the face.
14 Apply glue to the back of your "mask" paper. Glue it to the paper on which you have drawn the face, which now becomes the outside paper. Do not apply glue in the area of the mask.
15 Now add details to your figure. You can add a uniform below the mask.
Other Ideas
Bird in a Cage
Make a bird cage the same way you made the mask but use heavy paper and make the spacing between the top and bottom bars smaller. Draw, colour and cut out a small bird. Tape a short piece of string to the back of the bird, then tape or tie the top of the string to the top bar. You may have to glue the top bar to the paper to support the bird.
More Pop-ups within Pop-ups
Draw a pop-up shape, then draw and cut lines inside it. Neither the pop-up shape nor the lines should go farther than the middle of the page. To push your pop-up through to the other side of the paper, follow steps 10 and 11 on page 17.
With these two ideas, you'll want every other bar to stick out. To do this, bend back every second strip and cut it off. Push these strips back, as in step 8 on page 16.
Valentine Heart
Skeleton
You can cut out sections in the middle of a pop-up shape.
Window
Mirror
Make a Dragon That Turns into a Bird
1 Take two different coloured pieces of paper, each 21.5 cm x 28 cm (8½ in. x 11 in.). Fold each paper in half. Put one aside.
2 Place the other paper so that the folded edge is on your left. Mark a dot 8 cm (31/8 in.) from the bottom of the paper.
3 From this dot, draw a curved line as shown.
4 From the end of the curved line, draw a diagonal dotted line towards the folded edge of the paper. The diagonal dotted line should not reach as far as the top edge of the paper.
5 Cut the curved line. Do not cut the dotted line.
6 Fold the cut piece up along the dotted line. Press the fold firmly. Fold the cut piece down to its original position again.
7 Open your paper and hold it like a tent. Push the cut piece down in the opposite direction of the fold, so that it is pushed through to the other side of the paper. Close the paper and press firmly. When you open your paper, a dragon's snout will pop out.
8 Draw a dragon with its eyes just above the snout and its body to the right of the snout.
9 Add details by drawing on nostrils and scales. To make teeth, cut out small triangles of paper. Fold the bottoms of the triangles to create tabs. Apply glue to the tabs and place them along the inside edge of the snout.
To turn the dragon into a bird when you hold the paper upside-down:
10 Draw, colour and cut out a red paper feather. Apply glue to the end of the feather and place it under the bottom of the snout. The feather becomes fire coming from the dragon's mouth.
11 To make a horn for the dragon, take a piece of paper 7 cm x 7 cm (2 2/3 in. x 2¾ in.). Fold it in half. Draw a triangle shape as shown and cut it out.
12 Fold back the bottom edges of the shape in opposite directions to create tabs. Apply glue to the bottom of the tabs and inside the horn. Match the folds of the tabs with the fold of the snout and place the horn just above the nostrils.
13 If you turn your dragon upside-down, you will see a bird. The nostrils become eyes and the horn becomes a beak!
14 Apply glue to the back of your paper. Glue it on the paper you put aside. Make sure that you do not apply glue in the area of the pop-up section.
Other Ideas
Instead of making a dragon, make a boy with a baseball cap.
Read a Good Book
1 Take two different coloured pieces of paper, each 21.5 cm x 28 cm (8½ in. x 11 in.). Fold each paper in half. Put one aside.
2 Place the other paper so that the folded edge is on your left. From the folded edge, draw two curved lines. This will be the head of the reader.
3 From the folded edge, draw two more curved lines as shown. These lines will be the reader's arms. Make sure that no lines reach beyond the middle of the page, which is 7 cm (2¾ in.) from the folded edge.
4 Cut all of the lines, starting at the folded edge. Fold the cut sections forward and then fold them back to their original positions.
5 Open your paper and hold it like a tent. Push the cut sections through to the other side of your paper. Close the paper and press firmly. Open to see the pop-up head and arms.
6 Complete the head by drawing and colouring a face and hair.
7 Draw lines from the head to the pop-up arms and draw in the rest of the body. Draw hands in the middle of the pop-up strip arms.
8 Draw, colour and cut out a small book that is 5 cm x 2.5 cm (2 in. x 1 in.). Fold it in half. Decorate it and write a title on the top half of the book.
9 Apply glue to the bottom half of the book as shown. Place the book behind the hands, so that the folds match.
10 Apply glue to the back of your paper. Glue it on the paper you, put aside, which now becomes the outside paper. Make sure that you do not apply glue in the area of the pop-up sections.
11 Now decorate the inside and outside papers. This idea would be very good for a reading or library display.
Other Ideas
Thank-you Card
Write your thank-you note on the book.
Gift Card
Put a small, light gift, such as a ring, inside the book. Make sure the gift fits within one side of the fold.
(Continues...)
Excerpted from How To Make Super Pop-Ups by Joan Irvinem, Linda Hendry. Copyright © 1992 Joan Irvine. Excerpted by permission of Dover Publications, Inc..
All rights reserved. No part of this excerpt may be reproduced or reprinted without permission in writing from the publisher.
Excerpts are provided by Dial-A-Book Inc. solely for the personal use of visitors to this web site.
Table of Contents
IntroductionPart 1: Super Cutting
Make a Birthday Cake
Make a Lizard with Amazing Eyes
Make a Catcher's Mask
More Pop-ups within Pop-ups
Make a Dragon That Turns into a Bird
Read a Good Book
Make a Bird Fly
Make an Albatross
Make a Big Bear Hug
Make More Animals Using Cut Shapes
Part 2: Super Structures
Make an Awesome Insect
Make an Alien from Outer Space
Make Skyscrapers
Make a Boat
Make a Holiday Tree
Make a Castle
Make a Pinocchio's Nose Grow
Make a Creepy, Crawly Crab
Part 3: Super Slides and Turns
Make a Face with Changing Eyes
Make a Curved Sliding Strip
Make a Juggler
More Super Pop-ups Using Sliding Strips
Make a Victorian Turning Circle
Part 4: Superbly Different Pop-ups
Make a Noisy Robot
Make a Snapping Sports Car
Make a Monster from an Envelope
Make a Story Box
Make Pop-up Masks
Make Enormous Pop-ups for the Stage
Giant Pop-ups for Displays
Basic Pop-up Techniques