

eBook
Related collections and offers
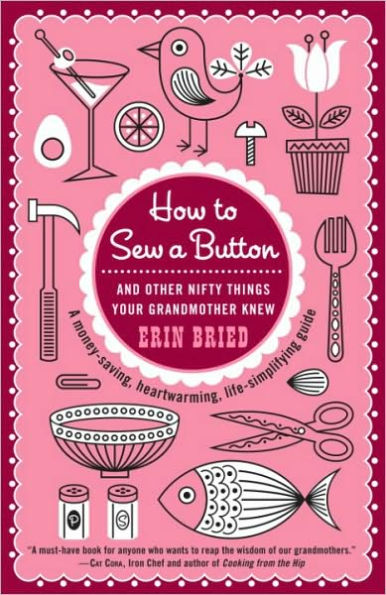
Overview
Nowadays, many of us “outsource” basic tasks. Food is instant, ready-made, and processed with unhealthy additives. Dry cleaners press shirts, delivery guys bring pizza, gardeners tend flowers, and, yes, tailors sew on those pesky buttons. But life can be much simpler, sweeter, and richer–and a lot more fun, too! As your grandmother might say, now is not the time to be careless with your money, and it actually pays to learn how to do things yourself!
Practical and empowering, How to Sew a Button collects the treasured wisdom of nanas, bubbies, and grandmas from all across the country–as well as modern-day experts–and shares more than one hundred step-by-step essential tips for cooking, cleaning, gardening, and entertaining, including how to
• polish your image by shining your own shoes
• grow your own vegetables (and stash your bounty for the winter)
• sweeten your day by making your own jam
• use baking soda and vinegar to clean your house without toxic chemicals
• feel beautiful by perfecting your posture
• roll your own piecrust and find a slice of heaven
• fold a fitted sheet to crisp perfection
• waltz without stepping on any toes
Complete with helpful illustrations and brimming with nostalgic charm, How to Sew a Button provides calm and comfort in uncertain times. By doing things yourself, with care and attention, you and your loved ones will feel the pleasing rewards of a job well done.

Product Details
| ISBN-13: | 9780345520142 |
|---|---|
| Publisher: | Random House Publishing Group |
| Publication date: | 12/15/2009 |
| Sold by: | Random House |
| Format: | eBook |
| Pages: | 304 |
| Sales rank: | 758,276 |
| File size: | 4 MB |
About the Author
Read an Excerpt
1 Cooking •••
Cooking at home is cheaper, healthier,and just plain better.
Wake Up Happy •••
"I do think anyone who can read can learn to cook." -Mildred Kalish
How to Make Blueberry Pancakes
Step 1: If you've got the blueberries, chances are you've also got everything else you need to make these tasty flapjacks for two. Gather your ingredients: 1 egg (beaten but not conquered), 1 cup milk, 2 tablespoons canola oil (or melted butter), 1 tablespoon sugar, 1 cups flour, teaspoon salt, 3 teaspoons baking powder, and cup blueberries (fresh or frozen).
Step 2: Did that take you forever? If so, chug a cup of joe. Then, in a large bowl, using an electric or hand beater, mix your egg, milk, oil, and sugar.
Step 3: With a wooden spoon, stir in the flour, salt, and baking powder. Don't stress about the lumps! It's better to leave a few in.
Step 4: Pop a few blueberries in your mouth, and then add the rest to the batter.
Step 5: Add a pat of butter (or a drizzle of oil) to a frying pan, and bring it to a sizzle on medium heat. No matter how hungry you are, resist turning up the flame or you'll have burned pancakes with raw insides.
Step 6: Using a ladle, drop some batter into the center of the pan to form a flapjack of your desired size. A quarter cup drop will yield about nine palm-sized cakes.
Step 7: When the edges begin to bubble up, scoot a spatula beneath the flapjack and flip it over. Refrain from throwing it in the air, unless your floor is super clean and no one is watching.
Step 8: Once both sides are golden brown, remove from heat, plate, and serve.
More Nifty Tips: • If you're going to use frozen berries, defrost them first.
• Spritz a few drops of water into your frying pan before adding the batter. If it sizzles, you'll know it's ready. If not, keep it on the fire a little longer.
• Serve with real maple syrup if you've got it!
Be a Strong Chick •••
"Chicken was a special dinner, because we didn't buy any meat back then. We'd just get one from out back, wring his head off, cook him, and eat him. I didn't dread doing it then, but I wouldn't want to do it now." -Elouise Bruce
How to Roast a Whole Chicken
Step 1: Go to your local butcher, farm, or grocer and buy the whole bird. You'll need about pound per person. Dig out your roasting pan, and crank up your oven to 375 degrees. Then, shush! Give a listen. Is your belly growling? If so, have a little snack. It takes a good hour to roast a 3- to 3-pound bird.
Step 2: Get acquainted with your chicken. If you're temporarily grossed out, there's no kind way to say this: Get over yourself. You're about to eat this bird (and it's going to be delicious), so you might as well take responsibility for cooking it. Then, peek inside your chicken. If you see a bag of parts, pull it out. (It's the giblets, or heart, neck, and liver of a chicken, not necessarily your chicken. You can simmer them in water to make a broth or gravy, or you can just toss them.)
Step 3: Give your bird a bath for good measure. Rinse it, inside and out, under cold water, and then pat it dry with a paper towel.
Step 4: Prepare your seasonings. Mix softened butter (about to stick) with generous amounts of your favorite herbs and spices. Try chopped garlic (4 to 6 cloves), diced rosemary (about 5 full twigs' worth), and salt and pepper ( teaspoon or more). Or, chopped garlic, lemon zest, thyme, and tarragon. How much of each? Enough. Basically, just throw it all together. It's hard to cluck it up.
Step 5: Using your fingers (or, if you're still grossed out, an upside-down spoon), separate the skin from the meat, being careful not to rip or puncture it, or your bird will lose its juices. Once you've got some wiggle room in there, smush your butter mixture between the skin and meat, making sure to get it into every nook and cranny. Then, rub butter all over the outside of the bird, too, so it'll brown nicely in the oven.
Step 6: Season the inside of your chicken. Sprinkle in a good amount of salt and pepper, and then toss in a couple of whole garlic cloves, whatever leftover herbs you might have from your butter mixture (stems included), and a quartered lemon.
Step 7: Place your bird, breast and legs up, in your roasting pan. Tuck the tip of the wings underneath the body and, if you'd like, tie the legs together with kitchen string. It's not necessary, but it adds a dose of fancy.
Step 8: Pop your chicken in the oven, set your timer for an hour, go have a glass of wine or a gimlet, and wait.
Step 9: When the timer goes off, check on your chicken. Tilt it until some juices run out. If they're pinkish, it's not done yet. If they're clear, stick a kitchen thermometer into the fattest part of the thigh. Only when it reads 165 degrees is it done.
Step 10: Set your chicken on a platter on the countertop and let it rest for 10 minutes, so it gets good and juicy. (If you'd like to make gravy, now's the time. See page 8 for instructions.)
Step 11: Present your chicken to your dinner guests, preferably using grand gestures. Enjoy their oos and aahs, and then enjoy the chicken.
More Nifty Tips
• Buy an organic bird, if you can. That means it was raised with outdoor access and without antibiotics and was fed a vegetarian organic diet. It'll taste better and give you good karma.
• When buying a fresh chicken, check the sell-by date before purchasing and eyeball the amount of juice in the package. Lots of liquid may mean the bird has been sitting around for a while.
• To defrost a frozen chicken, keep it wrapped, put it on a tray, and set it in your fridge twenty-four hours before you plan to roast it. Do not set it out on your countertop, or you'll have some serious bacteria issues.
• No roasting pan? Buy a cheapo aluminum one and set it on a cookie tray (for stability) before placing it in the oven.
• For a healthier option, skip the butter. Just rub your bird with dry herbs and spices, and then drizzle with olive oil. Mmmmm.
• Always wash your hands-hello-with soap, after handling raw chicken.
• After you eat the chicken, toss the carcass in a large pot and cover with water. Add a few whole onions, some carrot chunks, and quartered celery stalks, plus salt and pepper. Bring to a boil, then let simmer for 4 hours. Skim off the fat, transfer to airtight containers, and store in the freezer for up to 3 months. Homemade chicken stock tastes better than anything you can get in a store, and it's cheaper, too!
Get Sauced •••
"The people who love to eat make the best cooks." -Grace Fortunato
How to Carve a Roasted Bird
Step 1: Choose your longest, most impressive-looking knife, and hone it. (See page 27 for instructions.) The sharper your blade, the less likely it'll appear that a caveman cooked your Thanksgiving dinner.
Step 2: Position the turkey, breast side up, drumsticks pointing toward you, and snip off any strings.
Step 3: Remove the legs. With your knife along the body, blade down, slice through the skin that attaches the leg to the body, down along the thigh meat, and finally through the joint, where the bones meet. (Don't saw through any bones, Hannibal. You'll make a mess. Just use the tip of your knife to sever the joint.) Set the leg and thigh aside, and repeat once more unless you bought a one-legged bird. (If you did that, hopefully you got a discount.)
Step 4: Poke that crazy-long, two-pronged fork that you've probably never used and that came with your knife set into the wing to secure the bird, and then turn your knife blade parallel to your work surface. Make a horizontal cut into the bird, just above the wing and below the breast.
Step 5: Poke your fork into the top of the bird, place your knife halfway up the breast, and slice down until you meet your horizontal cut. Place that piece of meat on a serving platter, and repeat, working your way up the breast to carve thin slices.
More Nifty Tips
• Let your bird rest for 10 to 15 minutes before carving to seal in the juices.
• Sneak a folded paper towel between the turkey and the plate. It'll keep the turkey from sliding around.
• Separate the drumsticks from the thighs before serving to prevent fights at your table.
• Trim off the wings, if anyone would like those, at their joints with poultry shears.
• Save your carcass to make a stock. See page 7 for tips.
• If you have any questions while carving, and your grandmother isn't around to call, try the Butterball Turkey Hotline at 1-800-BUTTERBALL. Seriously. It's open weekdays from 10 a.m. to 7 p.m. (CST), and operators will answer all your birdbrained questions for free.
Be a Good Catch •••
"You just can't go fishing, and expect somebody else to clean your catch." -Nikki Spanof Chrisanthon
How to Fillet a Fish
Step 1: If you're at all squeamish, take a deep breath, and know this: The fish is already a goner, and it's not nearly as slimy as you think it's going to be.
Step 2: Lay your fish flat on a cutting board, belly facing away from you, give thanks, and then grab your thinnest, sharpest, longest knife.
Step 3: Lifting up the pectoral fin (the little one behind the gills), place your knife, blade down, perpendicular to the fish, make your most dramatic grimace, and cut downward to (but not through) the backbone. Whew! That's over with. Nice job.
Step 4: Starting behind the head and using just the tip of your knife, run your blade along the top edge of the fish, near the dorsal fin, to the tail, slicing along (but not through) the rib cage. As the meat separates from the fish, peel it back and repeat your gentle slicing from head to tail until the full fillet is free. See? That wasn't so bad at all.
Step 5: Flip the fish, and repeat steps 2 through 4, for the second fillet. Now, you're a total pro-and you're almost finished!
Step 6: Inspect each fillet carefully. If you see any bones, pluck them out. Once you think you've got them all out, run your fingers over your fillet to double-check, or your meal may be more memorable-cough, cough-than you bargained for.
Step 7: Remove the skin by placing each fillet, skin side down, on the cutting board. Holding your knife blade at a 45-degree angle, start on one end and cut through the meat down to (but not through) the skin. Then, pressing the loosened skin down with your fingernail to secure it, turn your blade parallel to your work surface and gently work it down the length of the fillet. Go easy now. Don't force it.
Step 8: Rinse the fillets with cold water, and fry 'em up
More Nifty Tips
• If you're buying, not catching, your fish, peek inside the gills. If they're red, it's fresh.
• Too slimy? You can always wear a pair of gloves.
• Squeeze lemon juice on your hands after filleting and before washing to help your patties smell fresh.
Rise Up and Save Dough •••
"I remember Mother baking bread. That sure smelled good when you walked home from school. I loved getting a slice with butter. My sister and I each liked the heels. She'd have a hand on one end and I'd have a hand on the other, but my mother put a stop to that." -Jean Dinsmore
How to Bake Bread
Step 1: Gather up your ingredients: 3 cups bread flour, 3 cups whole wheat flour, 3 cups tepid water, 2 teaspoons salt, and 1 teaspoons instant dry yeast (a.k.a. "RapidRise yeast"). You'll also need two loaf pans, a touch of oil or butter, and the patience of Job. It's best if you set yourself up with something productive to do, besides clicking "refresh" on your Facebook page for hours.
Step 2: In a large bowl, dump in all your ingredients, and combine them into a shaggy mass using your hands. You'll know you've done it right if your mixture looks like a bad '70s carpet. Don't be afraid to get messy! "Gravy was always on our table. It was just part of the meal. A potato wasn't anything without gravy. It's so good." -Alice Loft How to Make Gravy
Step 1: While your just-out-of-the-oven meat rests on your serving platter for 10 minutes, pour the drippings from the roasting pan into a bowl. Then, have a glass of wine while you wait for the fat to float to the top. It'll take a few minutes.
Step 2: Gently spoon off the fat, or the top layer of clear goop, so your gravy isn't a greasy mess. Transfer whatever's left in your bowl back to the pan.
Step 3: Set your roasting pan directly on a burner, fired up to medium heat. Add 1 cup stock and, with a wooden spoon, scrape the bottom of the pan to free up any yummy bits. Let simmer.
Step 4: In a separate bowl, make a thickener by mixing 2 tablespoons flour with 4 tablespoons stock. Whisk it like crazy until all lumps are gone.
Step 5: Pour your thickener into your roasting pan, and whisk like you've never whisked before. Keep going until your gravy (and your bicep) is sizzlingly hot and as thick as you'd like. Too thick? Add more stock. Too thin? Whip up some more flour paste ( one part flour to two parts stock) and add. Too stressed? Have another glass of wine.
Step 6: Season your gravy with salt and pepper, and pour it into a fancy boat or old chipped bowl. Doesn't matter what you put it in, it's still going to taste divine. Serve.
More Nifty Tips
• For creamier gravy, replace half the stock with milk.
• To stretch your gravy, just add more stock in step 3 and make more thickener (one part flour to two parts stock) in step 4.
• If you're having trouble skimming the fat off the drippings (step 2), pop the drippings in the freezer for a few minutes. The fat will glob up on top, which makes it easier to scoop out.
Talk Turkey •••