

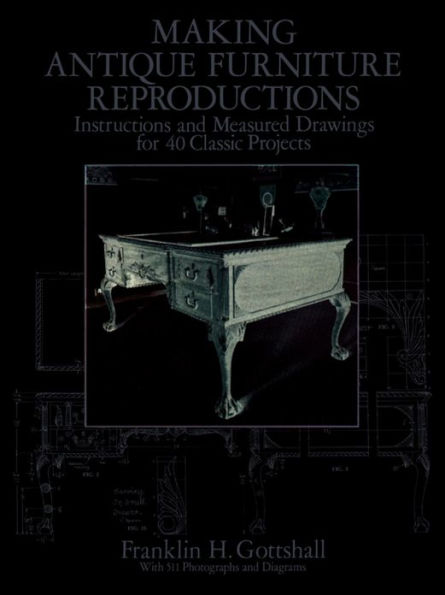
Making Antique Furniture Reproductions: Instructions and Measured Drawings for 40 Classic Projects
264


Making Antique Furniture Reproductions: Instructions and Measured Drawings for 40 Classic Projects
264eBook
Available on Compatible NOOK devices, the free NOOK App and in My Digital Library.
Related collections and offers
Overview
With this profusely illustrated guide, even beginning woodworkers can build precise reproductions of the most sought-after antique furniture — heirloom pieces by Sheraton, Hepplewhite, Duncan, Phyfe, Chippendale, and other celebrated craftsmen. It's possible by following the simple, step-by-step procedures outlined in this expert manual.
You'll learn how to construct such magnificent antiques as a Chippendale flat-topped partner's desk, Queen Anne handkerchief table, Sheraton drop-leaf dining table, Hepplewhite four-poster bed, grandfather clock, Queen Anne spice cabinet, and many more. Every step is clearly explained and illustrated, with remarkably detailed and precise construction drawings, accompanied by exact measurements. You'll even find superb photographs of the finished pieces.
The book begins with an expert introduction to the fundamentals of cabinetmaking and woodworking: how to cut, square, and plane lumber; the use and care of hand tools; and then clear explanations of such processes as joinery, drawer construction, dovetailing, wood turning, gluing, bull and claw foot carving, and other wood carving details as well as how to choose the correct stock. Also included is a wealth of time-tested advice on selecting hardware, finishing, and other aspects of the craft.
No matter what your level of woodworking expertise — novice to expert — the exceptionally precise and well-thought-out instructions and diagrams in this book will enable you to craft beautiful and authentic antique furniture you'll be proud to use and display for years to come.

Product Details
| ISBN-13: | 9780486161648 |
|---|---|
| Publisher: | Dover Publications |
| Publication date: | 11/15/2012 |
| Series: | Dover Crafts: Woodworking |
| Sold by: | Barnes & Noble |
| Format: | eBook |
| Pages: | 264 |
| Sales rank: | 927,364 |
| File size: | 27 MB |
| Note: | This product may take a few minutes to download. |
Read an Excerpt
Making Antique Furniture Reproductions
Instructions and Measured Drawings for 40 Classic Projects
By Franklin H. Gottshall
Dover Publications, Inc.
Copyright © 1971 Franklin H. GottshallAll rights reserved.
ISBN: 978-0-486-16164-8
CHAPTER 1
Some Useful Fundamentals of Gabinetmaking
WOOD, being the prime material with which the cabinetmaker should concern himself, we feel that anyone using this book needs to know a great deal, not only about characteristics of this most versatile raw material, but about methods of choosing the proper kind for the use to which it is to be put, shaping it, and getting it ready to use in whatever worthwhile project he may decide on. Much ought to be known about how to prepare various pieces in order to have them ready to assemble, and the best ways of putting them together once this preliminary work has been done. Therefore this chapter will explain a few principles of woodworking to help those whose knowledge of such principles may be limited or nonexistent.
CUTTING STOCK TO SIZE AND SQUARING IT
It has been the author's experience that the essential first step in teaching woodwork to beginners is to teach them how to cut, square, and plane lumber to predetermined sizes, using hand tools only. Insistence at the beginning on the use of hand tools only is important because if handwork in wood is properly mastered by beginners, they will have relatively little difficulty in mastering the essentials of working with laborsaving electric-powered machinery later on. It is not necessary to use large pieces of wood to practice these essential operations. Small pieces of wood have some advantages over larger pieces in the beginning, such as greater ease of manipulation, less surface to cover, and consequently less effort required to accomplish the ends sought.
Start with a piece of yellow poplar, mahogany, red gum, or some other wood similar to these in texture, which is neither too soft nor too hard. Generally speaking, soft-textured cabinet woods, like the ones we have mentioned, require sharp tools to work them, but are not so hard or tough that they will make the job needlessly difficult for the beginner. Practice blocks should be free of knots. While learning to deal with knots is something every beginner will have to cope with later, forcing him to deal with this additional handicap at this time would only slow the learning process and might impede progress rather than help it.
Choose a piece of unplaned stock measuring roughly 1 inch thick, 31/2 inches wide, and 71/2 inches long. As a first step number the sides, using an ordinary lead pencil. The better wide side or face is #1; the better edge is #2; the better end is #3. The opposite side of 3 is 4; the opposite of 2 is 5; the opposite of 1 is 6. Note: the sum of opposite pairs of sides always equals seven. (See Fig. 1.)
Before starting work on the block, be sure the plane is sharp and properly set. The best plane to use for the purpose in hand is a jack plane. To sharpen a plane or chisel proceed as follows: grind the plane iron by holding the blade as shown in Fig. 2, with the bevel on a grindstone or emery wheel. The bevel should be considerably wider than the thickness of the blade, straight, and at right angles to the side of the blade. Move the blade sideways, back and forth over the stone, until a smooth, slightly concave bevel has been formed. Keep from burning the cutting edge by dipping the blade into water frequently or by using light pressure when holding it on the stone.
After a plane blade has been ground to shape on an emery wheel or grindstone, it must be whetted to make it sharp. To do this, hold it as shown in Fig. 3, with the bevel flat on the oilstone. Use machine oil thinned with kerosene on the oilstone as a lubricant and to keep the surface of the stone from glazing. Whet the plane iron by moving it over the entire surface of the oilstone with a circular motion. Exert considerable downward pressure on the blade while whetting. Remove the wire edge formed by whetting by reversing the blade and laying it flat on the stone with the bevel on top and then moving it back and forth over the stone several times. Repeat these processes as often as necessary until the wire edge has been entirely eliminated and the edge is keen and sharp.
Decide the direction to plane by determining which way the grain of the wood runs. Grain lines on the edge of a board are in most cases clearly enough defined to show which way the grain runs on top or bottom, though this is not true in every case. If they are, plane side #1 in the direction the grain lines on the edge of the block go uphill. (Figs. 4 and 5.) If the grain lines are not clearly defined, then try planing in both directions to find which way the grain runs. In almost every instance, the grain on the opposite side of the block, or piece of wood, will run in the opposite direction.
Fasten the block in a vise, and plane. Begin planing the side at the edge closest to you. Test the side for flatness (Figs. 6 and 7). Do no sanding.
Plane edge #2 next. To do this, place the block in a vise as nearly level as possible, with edge #2 on top. Keeping the plane in line with the piece of wood you are planing (not angled), and holding it as level as possible, plane the edge (Fig. 8). Test the edge for squareness with side 1, and for flatness (Fig. 9).
Plane end #3. Place the block in a vise as nearly level as possible and, with one edge turned toward you and the other toward the bench, clamp the block low so that the end is just above the vise. Check the plane for sharpness, then set the blade to cut a fine shaving. Grasp the plane firmly, keeping the wrists fairly stiff. Plane only a little over halfway across the end several times; then reverse the edges and plane in the opposite direction. Repeat this process until the end is smooth, flat, and square with the first two sides. Note: if you were to plane all the way across the end, splinters of wood would be broken off on the far edge. (Figs. 10 and 11.)
Now measure and mark off the length to which you want to plane your block. Saw and plane the block to this line. Place the ruler on the block, as shown in Fig. 12, and mark the length, which should be 7 inches. With a try square held tightly against the squared edge of the block, draw a fine pencil line or make a knife line at the 7-inch mark. Continue squaring it clear around the sides and edges of the block as shown in Fig. 13. Then clamp the block in the vise with side #1 on top, and with end #4 extended just enough to saw off most of the waste; then saw off the waste, being careful not to split off a piece of the end when the saw cut is completed. Then plane end #4 to this line, going through the same steps as you did when you planed end #3.
Mark the block for width and plane it to this line. Set the marking gauge to the 3-inch mark. Place the hand with which you push the gauge so that the index finger is on one side of the gauge block and the middle finger is on the other side. With the thumb on the beam, push the gauge away from you to mark the width of the block (Fig. 14). If you have a lot of waste left to take off, saw nearly to the line with a ripsaw; then plane to the line.
Mark the block for thickness and plane it to this line. Set the marking gauge to ¾ inch. Tilt the gauge slightly forward and, holding it as before, gauge a line around the block as shown in Fig. 15. Plane to this line until the line disappears, and test for flatness and to see if all sides are square to each other.
While this is a small block of wood you have just planed, squared, and cut to size, large pieces of wood are done the same way, so that what you have learned when doing the small block will apply to doing boards or glued-up stock of much greater size. Instead of using the gauge and try square you may have to lay off some of the lines with a framing square and a straightedge on larger pieces of wood, but except for these variations the steps and procedures are the same.
A number of other operations that a beginning woodworker will have to know how to perform may now be tried out on this block of wood. Some very useful ones for the beginner to try are shown in Fig. 16.
Draw all lines and layouts for cutting the mortise, rabbet, gain, and so on, that appear on the block. Use a try square and a sharp pencil or knife for all lines across the grain. Use a gauge for marking all lines going with the grain. Use a compass or dividers for all curved lines. Use a try-and-miter square (shown in Fig. 7) for laying out the 45-degree angle.
To cut the mortise, bore two 5/8-inch holes through the block. Bore only halfway through from each face. Chisel the hole. To do this pare away the wood a little at a time, using a slicing cut. Check the walls of the mortise for squareness.
To cut the gain, drive the chisel, lightly, straight down all around, about 1/16 inch in on the waste sides of the lines. The flat side of the chisel should be next to the lines when doing this. Use a wooden mallet to hammer the chisel. Trim out the waste by hammering the chisel from the center of the gain toward the first cuts made, holding the chisel with the beveled side down. Repeat this until the proper depth has been attained. Complete chiseling the gain by trimming with the flat side of the chisel.
To cut the rabbet, saw on the waste side of the line with a backsaw, sawing across the face side of the block. Do not saw entirely to the bottom of the rabbet, but allow a little wood to remain for trimming. Chisel out the waste. Begin near the surface and work down gradually to the line. Finish the rabbet by chiseling across the grain. Turn the bevel of the chisel up when doing this.
To cut the dado on the edge of the block, saw from the edge of the block nearly to the line opposite the edge. Stay on the waste side of the lines going across the grain. Chisel out the waste, cutting from the middle toward both ends of the block. Trim the edges with slicing chisel cuts.
To cut the dado on the end of the block, saw from the end nearly to the line going across the grain. Chisel out the waste, a little at a time, cutting from both faces of the block toward the center of the end. Trim the edges. Some of the waste may be sawed off with a coping saw before it is chiseled, to do the job more quickly.
To cut the miter, saw off on the waste side of the line. Trim to the line with a plane or chisel.
To cut the outside curve, saw on the waste side with a coping saw. When using a coping saw the teeth of the coping-saw blade should be pointed toward the handle of the saw. To hold the saw properly, take the handle in the right hand and place the left hand over the right if you are right-handed. Keep the blade level while you are sawing. Trim to the line with the chisel, using the flat side of the chisel.
To cut the inside curve, saw on the waste side with a coping saw. Trim to the line with a chisel, using the beveled side of the chisel.
LAYING OUT AND MAKING DOVETAIL JOINTS
Many of the pieces of furniture in this book and others like it have dovetail joints to fasten drawer sides to fronts and backs. Dovetail joints are also used to join other members together wherever fine cabinetwork is done.
Dovetail joints, on work where appearance counts, and especially on antique furniture or good custom-made reproductions, are always made with the tail members wider than the pin members. Machine-made dovetail joints may be a little stronger because the tails and pins are made alike in width, but they are not nearly as neat in appearance. To lay out good dovetail joints proceed as follows: set the sliding T bevel to an angle of 10 degrees. If you do not have a protractor to do this, square a line across a board, and on this line measure off a distance of 6 inches. Then at right angles to the 6-inch mark lay off a distance of 1 inch, and set the sliding T bevel to this angle, as shown in Fig. 17. This will give you an approximate 10-degree angle to use in laying out dovetails.
Lay out the tail members of the dovetail joint. On drawers, these will be found on the drawer sides. Decide how many tails you need in the joint and divide the end of the drawer side into that number of equal spaces.
Let us assume you have a drawer side on which you wish to put five tails, with six spaces for the pins to which the tails are to be joined. But you find the width of the drawer side to be such that it is not easily divided into five equal parts with a ruler. To divide the distance quickly and easily, lay the ruler across the drawer side at an angle which spans its width from the 0 to the 5-inch mark, since this distance may then easily be divided into five equal parts, as shown in Fig. 18. Then at distances 1 inch apart on the ruler, draw lines to the end of the board. This will divide the board into five equal parts across its width. Using the division lines as center lines for the pins, tails and pins may be laid out with the sliding T bevel as shown in Fig. 19.
Measure off the distance from the end of the board for the length of the tails, and with a try square draw this line around all four sides of the board as shown at A in Fig. 19.
If only hand tools are to be used, saw on the waste side of each tail, and then chisel the waste pieces of the tail members by cutting away half the waste from each side of the board, as shown in Fig. 20.
If machinery is used, several methods of cutting out the waste on the tail members of dovetail joints may be used. One of these is to cut them out on the band saw and then flatten the back end of the hole with a sharp chisel. Another method is to saw out the middle of the hole between the tails on the table saw, using one or more dado-head blades, with the board fastened upright to the crosscut fence, and then trimming to the angle with a chisel. Still another, and this one is probably the best method, is to grind the cutting edge of a spacer blade used in a dado head, to the proper angle, and then, tilting the saw arbor to 10 degrees and clamping the board upright against the front of the crosscut fence, cut out the waste right to the line.
Tails are laid out on both ends of a drawer side if the drawer back is to be joined to the drawer sides with dovetail joints.
Now lay out the pin members of the dovetail joint. In putting drawers together, these would be laid out on the ends of the drawer front and drawer back. To do this, clamp the drawer front in the vise with the end on top. Gauge line A across the end for the length of the pins, as shown in Fig. 21. Then lay the tail member, which in this case is the drawer side, on top of the end, with its end lined up with line A. Using a knife blade, sharp pencil, or scriber, trace the outlines of the tails on the ends of the drawer front. Having done so you now have the pin members laid out on the ends of the drawer front, as shown by lines B in Fig. 21.
Determine which parts you must keep for the pins, and saw on the waste side of each line with a dovetail saw, or a fine-tooth backsaw. If the dovetail joint goes entirely across the end of this board, this type being known as a through dovetail joint, then most of this waste may be cut out on the band saw to line C, and the rest of it may be removed very easily with a coping saw, if you have first cut to lines B and C with the dovetail saw.
All of the waste between the pins, on through dovetail joints, may be removed on the table saw by setting the crosscut fence to the 10-degree angle, and using a stopblock on the fence to regulate the cuts and remove the waste.
If you are not making a through dovetail joint, but are making a dovetail joint on which the dovetailing does not show on the outside of the drawer front, then the sawing must be done with the dovetail saw held at an angle of 45 degrees when making the cut, which goes all the way to line C, but only about two-thirds of the way across the end of the drawer front as shown in Fig. 22. Such a dovetail joint is known as a half-lap multiple dovetail joint. The waste between the pins must be chiseled out. To do this, use a narrow paring chisel on which not only the cutting edge is beveled, but the sides of the blade as well. With this type of chisel it is easier to get into corners that are almost inaccessible to the ordinary socket-firmer chisel. (See Fig. 23.) In Fig. 24 we show a lowboy with beautifully made half-lap multiple dovetail joints on the drawers.
(Continues...)
Excerpted from Making Antique Furniture Reproductions by Franklin H. Gottshall. Copyright © 1971 Franklin H. Gottshall. Excerpted by permission of Dover Publications, Inc..
All rights reserved. No part of this excerpt may be reproduced or reprinted without permission in writing from the publisher.
Excerpts are provided by Dial-A-Book Inc. solely for the personal use of visitors to this web site.
Table of Contents
Contents
Title Page,Copyright Page,
Dedication,
Acknowledgments,
Foreword,
ONE - Some Useful Fundamentals of Gabinetmaking,
TWO - Furniture Fishing,
THREE - Hardware,
FOUR - Nested Tables: Set of Four,
FIVE - Rested Tables: Set of Two,
SIX - Queen Anne Tea Table,
SEVEN - Queen Anne Pembroke Table,
EIGHT - Queen Anne Handkerchief Table,
NINE - Queen Anne Lowboy,
TEN - Small Jheraton Table,
ELEVEN - Sheraton Bench,
TWELVE - Kneading Trough,
THIRTEEN - Snake-Foot Tilt-Top Table,
FOURTEEN - Duncan Phyfe Library Table,
FIFTEEN - Duncan Phyfe Dining Table,
SIXTEEN - Sheraton, Drop-Leaf Dining Table,
SEVENTEEN - Sheraton Goffee Table,
EIGHTEEN - Sheraton Dressing Table and Mirror,
NINETEEN - Heplewhite Four-Poster Bed,
TWENTY - Sheraton Four-Poster Bed,
TWENTY-ONE - Grandfather Glock,
TWENTY-TWO - Zueen Anne Chest-on-Frame,
TWENTY-THREE - Ghippendale Partner's Desk,
TWENTY-FOUR - Early American Dresses,
TWENTY-FIVE - Dutch Cupboard,
TWENTY-SIX - Block Front Ghest-on-Ghest,
TWENTY-SEVEN - Carved Shell-Top GornerGupboard,
TWENTY-EIGHT - Queen Anne Gorner Gupboard,
TWENTY-NINE - Silver Ghest,
THIRTY - Spice Gabinet,
THIRTY-ONE - Bachelor's Ghest,
THIRTY-TWO - Salem Chest of Drawers.,
THIRTY-THREE - Ghippendale Fretwork Mirror Frame,
THIRTY-FOUR - Hepplewhite Upholstered Armchair.,
THIRTY-FIVE - Windsor Side Chair,
THIRTY-SIX - Queen Anne Side Chair,
THIRTY-SEVEN - Chippendale Ladder-Back Side Chair,
THIRTY-EIGHT - Chippendale Ladder-Back Armchair.,
THIRTY-NINE - Chippendale Pierced Splat-Back Chair,
FORTY - Chippendale Upholstered Wing Chair,
Glossary,
Index,