

Simply Beautiful Homemade Cakes: Extraordinary Recipes and Easy Decorating Techniques
256

Simply Beautiful Homemade Cakes: Extraordinary Recipes and Easy Decorating Techniques
256Paperback
-
PICK UP IN STORECheck Availability at Nearby Stores
Available within 2 business hours
Related collections and offers
Overview
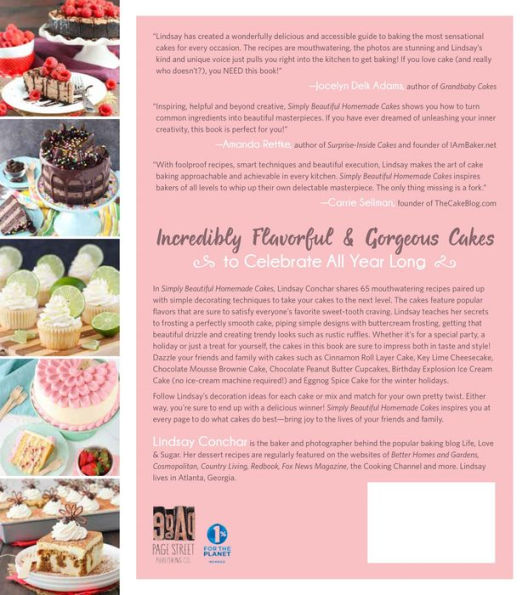
In Simply Beautiful Homemade Cakes, Lindsay Conchar shares 65 mouthwatering recipes paired up with simple decorating techniques to take your cakes to the next level. The cakes feature popular flavors that are sure to satisfy everyone’s favorite sweet-tooth craving. Lindsay teaches her secrets to frosting a perfectly smooth cake, piping simple designs with buttercream frosting, getting that beautiful drizzle and creating trendy looks such as rustic ruffles. Whether it’s for a special party, a holiday or just a treat for yourself, the cakes in this book are sure to impress both in taste and style! Dazzle your friends and family with cakes such as Cinnamon Roll Layer Cake, Key Lime Cheesecake, Chocolate Mousse Brownie Cake, Chocolate Peanut Butter Cupcakes, Birthday Explosion Ice Cream Cake (no ice-cream machine required!) and Eggnog Spice Cake for the winter holidays.
Follow Lindsay’s decoration ideas for each cake or mix and match for your own pretty twist. Either way, you’re sure to end up with a delicious winner! Simply Beautiful Homemade Cakes inspires you at every page to do what cakes do best—bring joy to the lives of your friends and family.

Product Details
| ISBN-13: | 9781624142826 |
|---|---|
| Publisher: | Page Street Publishing |
| Publication date: | 10/25/2016 |
| Pages: | 256 |
| Sales rank: | 405,943 |
| Product dimensions: | 7.90(w) x 8.90(h) x 0.70(d) |
About the Author
Read an Excerpt
Simply Beautiful Homemade Cakes
Extraordinary Recipes and Easy Decorating Techniques
By Lindsay Conchar
Page Street Publishing Co.
Copyright © 2016 Lindsay ConcharAll rights reserved.
ISBN: 978-1-62414-272-7
CHAPTER 1
The Best First Steps
to a Beautiful Cake
Find everything you need to know about ingredients, substitutions, different pieces of equipment and how to get started with baking in this chapter. It's a great place to start, especially if you aren't as familiar with the basics. Plus, there are plenty of photos for visual guidance.
Measuring Dry Ingredients Properly
Ingredients in this book are provided in cups as well as in grams and milliliters. It's important to note that measuring cups are used for wet ingredients and measuring scoops are used for measuring dry ingredients. They do measure differently, so be sure to use the appropriate one for the ingredient you are measuring. While using scoops works for dry ingredients (flour, sugar, cocoa powder and so on), I much prefer working with a scale and weighing them. It really is so much more accurate. If you choose to use scoops, stir your flour and sugar before measuring to loosen them up a bit. Scoop out the ingredient and level the top with the straight side of a knife or something similar. Do not tap on the scoop to get more flour and sugar to fit — that will result in too much.
Whisking and Sifting Dry Ingredients
I'm not much of a sifter. I'm more of a whisker. Sifting aerates the flour and is also meant to combine the flour with other dry ingredients, so that they are more evenly incorporated with other ingredients. I personally find that whisking dry ingredients together does a great job of combining them and works just fine. If you prefer sifting, feel free. I do recommend doing one or the other (or both).
Folding
Folding is a delicate way of mixing two things of different densities together. Folding is often used in this book when combining whipped cream with something denser, when you want to be sure to preserve the air bubbles of the lighter mixture. You will typically use a rubber spatula to gently sweep along the bottom and sides of the bowl (sometimes cutting through the middle of the mixture as well) to gently combine the ingredients without deflating the lighter mixture.
Creaming
Most cakes in this book use the creaming method, by which butter and sugar are combined by beating for at least three to four minutes. The creaming process is very important. It adds air to the batter, which is extremely important in getting that light and fluffy end result. If you find your cakes are turning out denser than you expect, there's a chance the butter and sugar weren't fully creamed. You should notice a change in the color of the butter and sugar mixture when it's done. It'll be lighter in color and fluffy in texture, rather than smooth. The temperature of the butter is also important in this step. If it's too cold or warm, it won't cream well. The butter should be soft enough that when you lightly press into it you leave an indent, but your finger shouldn't go right through the butter. If the butter remains stuck to the sides of the bowl rather than being a little loose and fluffy, it is probably a little too warm. Please pay attention to recommended creaming times and don't skimp on this step.
To prepare a cake pan for baking, trace the size and shape of the cake pan onto parchment paper.
Cut out the parchment circle.
Spray the sides of the pan and place the parchment circle in the bottom.
Preparing Cake Pans for Baking
PREPARING A BASIC CAKE PAN
This is the first step in making a cake and shouldn't be overlooked. There's nothing worse than going through all the work of baking a cake and having it stick. After many years of figuring out what I like best, I find that spraying the sides of the pan with baking spray and lining the bottom of the pan with parchment paper works best. I typically will add a little baking spray to the bottom of the pan before adding the parchment paper, so that the paper doesn't slip. To make the parchment circles, simply trace your cake pan onto parchment paper and cut out the circle. I use a regular pen, but then I make sure to cut inside the line so that no pen lines make it into the cake pan. If you have food-decorating pens, those can also be used and are food safe. (See photos above.)
PREPARING A CAKE PAN FOR CAKE LAYERING WITHIN THE PAN AND USING MOCK COLLARS
When layering a cake made up of layers of a filling that is soft prior to refrigeration, such as an ice cream cake or mousse cake, this method can be used to keep the layers intact while stacking and refrigerating or freezing them until they are firm. If you don't have clear plastic cake collars (which can easily be purchased online), this method uses a cake pan with parchment paper that acts like a mock cake collar. An 8 × 3-inch (20 × 8-cm) pan is preferred, though an 8 × 2-inch (20 × 5-cm) pan should work all right. The higher the sides of the pan, the more stable the mock cake collar will be.
To prepare the pan, I first add a sturdy clear plastic wrap. (See photos here.) This will be used to lift the cake out of the pan when it's ready. Place the clear wrap over the pan with the two ends long enough that they'll stick above the edges of the pan when pressed into the pan.
Place an 8-inch (20-cm) cardboard cake circle (you may need to trim it down to fit in the pan) on top of the clear plastic wrap and use it to press the clear wrap into the pan.
Press the clear wrap up against the sides of the pan and do your best to smooth it.
Place your first cake layer into the pan. You may only have one cake layer and one layer of mousse or ice cream, or you may have several, but this should be the bottom layer of the finished cake.
To prepare a pan for cake layering, set out an 8 × 3-inch (20 × 8-cm) cake pan.
Place the clear wrap over the pan, making sure to have enough length on the two ends for overhang.
Use the cake circle to press the clear warp into the pan.
Press the clear wrap flush against the sides of the pan, leaving the overhang sticking above the sides.
Place the first layer of cake into the pan.
Place the parchment paper between the sides of the cake and the clear wrap.
The finished parchment mock collar should stick 2–3 inches (5–8 cm) above the edges of the cake pan.
Add the filling layer and then continue to build the cake as directed.
The finished layered cake, ready to be refrigerated or frozen, as directed.
Press strips of parchment paper into the pan, between the cake and the clear plastic wrap. You may need to use two strips. The parchment paper will form the mock collar. Be sure to press the parchment paper as far down between the cake and the pan as you can. The pan will be holding the paper in place as you build the rest of the cake.
Pour your filling on top of the cake layer and spread it evenly on top. In the cake shown in the photos, there is one of each layer, and as you can see, the filling comes about an inch (2.5 cm) above the edge of the pan and is held in place by the parchment collar. If you have multiple layers to work with, just carefully add one at a time.
PREPARING A CHEESECAKE AND SPRINGFORM PAN FOR A WATER BATH AND BAKING
To prepare a springform pan for the crust of a cheesecake, I grease the sides and bottom of my pan, then line the bottom with parchment paper. Greasing the sides of the pan helps keep the crust from sticking and the parchment paper makes it easy for me to remove the cheesecake from the bottom of the pan, if I decide to do so. I like to use a pen to trace the pan onto parchment paper, then trim just inside the drawn circle to make a parchment circle that fits the pan. If you are going to leave the cheesecake on the bottom part of the springform pan, the parchment paper may not be necessary. (See photos here. Note that the pan should have the cheesecake crust in it before preparing the water bath.)
Note: The parchment paper can be hard to remove from the bottom of the baked cheesecake once you remove it from the bottom of the springform pan. If you have a hard time removing it, just leave it. It usually comes off easily when the cheesecake is sliced. It should be smaller than the cheesecake itself, so it shouldn't be visible underneath the cheesecake when it's displayed.
Water baths are necessary in most cases to bake a cheesecake that doesn't crack and has a nice, smooth top. To prepare a springform pan for a water bath after the crust has been made and baked, I first start with a little secret. I like to use slow cooker liners to wrap the outside of my pan. My pans tend to leak and let water into my crust, and these liners prevent that leaking. If you have a leak-proof pan, you can skip this step.
Next, wrap the outside of the pan and slow cooker liner (if using) in aluminum foil.
Place the aluminum foil–wrapped pan inside another larger pan. I have large cake pans hanging around, but you can also use a roasting pan or any other pan large enough.
Fill the larger, outside pan with warm water that goes about halfway up the side of the aluminum foil–wrapped springform pan. Place the cheesecake in the oven and bake!
Note: There's a very specific reason for the baking process of a cheesecake. There's the bulk of the baking time, then the slow cooling process. To tell that the active baking time is complete and the cheesecake is ready for the cooling phase, the cheesecake should be firm around the edges but still little jiggly in the center — about 3 to 4 inches (7.5 to 10 cm) in the center will still be jiggly, but it should have become dull rather than shiny, and it should be set. At this point, the oven should be turned off and the cheesecake should sit in the oven for the specified amount of time with the door closed to keep the heat in. The cheesecake will continue to bake, but also begin to slowly cool. The third and final part of the process is to crack the door of the oven to further allow the cheesecake to cool slowly. This slow cooling process helps to prevent the cheesecake from cracking.
To prepare a pan for baking cheesecake, grease the sides of the springform pan and line the bottom with parchment paper.
Wrap the outside of the pan with a slow cooker liner, if using.
Wrap the pan and liner in aluminum foil.
Place the springform pan inside a larger pan and fill the larger pan halfway with warm water.
Cake Storage
LAYERED CAKES, SINGLE-LAYER CAKES AND CUPCAKES – Cake layers and cupcakes should cool completely on a wire rack. For cake layers, I also set them on parchment paper so that they don't dirty or stick to the rack. That isn't necessary for cupcakes. Once cool, they should be stored in an airtight container at room temperature to stay freshest. If they are stored before cooling completely, the condensation can create a soggy cake.
If you want to bake cake layers ahead of time and freeze them, wrap the cake layers in plastic wrap and then aluminum foil before freezing. To thaw cakes, keep them fully wrapped and allow them to thaw in the refrigerator.
It's best to remove domes from cake layers just before layering and building the cake. If you don't use the cake shortly after removing the dome, wrap the cake with plastic wrap to keep it from drying out.
I typically prefer to store cakes at room temperature, unless some ingredient in the cake would require refrigeration. Refrigeration can easily dry out a cake. Even if cakes are stored in the refrigerator, they are best served at room temperature. Cakes and cupcakes are usually best within a day or two of baking, but they should be OK for three to four days, particularly if well covered, frosted and stored at room temperature.
ICEBOX CAKES – These should be stored in the refrigerator. If you can cover them without ruining the decorations, please do. Otherwise, they should be fine stored in the refrigerator for two to three days.
COOKIE CAKES – These should cool completely in the pan before being removed and stored in an airtight container. They are best eaten within two to three days.
ICE CREAM CAKES – Store these in the freezer. If you can cover them without ruining the decorations, please do. Cardboard cake boxes can usually be found at craft stores or online, if you'd like to use one of those. Otherwise, ice cream cakes should be fine stored in the freezer for at least five to seven days. They will be edible after that point, as they are frozen, but the quality of the decorations and cake can lessen with extended freezing time.
CHEESECAKES – These should be stored in the refrigerator, covered (if it's possible to do so without ruining any decorations). Cheesecakes are best eaten within two to five days.
Ingredients
BAKING SPRAY – My preferred brand of baking spray is Baker's Joy. I use it to spray the sides of all my cake pans.
BUTTER – I use both salted and unsalted butter. Unsalted butter is used in the cake recipes. Using unsalted butter allows you to more accurately control the amount of salt added to the cake. However, if you have salted on hand, you don't need to run out and buy unsalted. Just replace the butter and leave out the additional salt in the recipe.
Salted butter is what I use in my frostings. That's a little unusual, but I prefer it. I typically use half butter and half shortening. For more on why and the recipe I use, please see here.
BUTTERMILK – This is not a typical thing you keep stocked in your refrigerator, and it's no fun to buy a whole carton for one recipe. For that reason, I am a big fan of powdered buttermilk. You can usually find it near the sweetened condensed milk and evaporated milk in the grocery store, and it has easy instructions on how to use it on the back.
CHOCOLATE CHIPS AND CANDY MELTS – There are several kinds of chocolate used throughout this book. I usually use semisweet chocolate chips which are easily found in grocery stores. I use Nestlé Toll House brand. Wilton Candy Melts are used for decorating in this book. They dry firmer than chocolate chips or other baking chocolate, making them ideal for chocolate shapes. You could also use Candiquik or almond melts.
CHOCOLATE SAUCE – My preferred chocolate sauce is Smucker's Sundae Syrup. It comes in a squeeze bottle that makes it easy to use, and it's a great consistency for drizzling. If it isn't available in your area, I'd suggest another sauce that is somewhat thick or can be heated to make a pourable consistency. Hershey's Syrup (the kind you'd use to make chocolate milk) will not be thick enough.
COCOA POWDER – I used two kinds of cocoa powder in this book: regular natural unsweetened, and a dark blend of natural and dutched cocoas. Both are Hershey's brand and either can be used in any recipe calling for cocoa powder. I used the one I thought would work best for each cake, but feel free to use the one you prefer. If you haven't tried the dark blend before, it makes a wonderfully rich, chocolatey cake. I do not recommend using a full Dutch-processed cocoa. It will likely cause problems with cakes rising or falling.
CORNSTARCH – Cornstarch is a thickener and is used in a few recipes. Flour can sometimes be used in its place, but you'll often need more to achieve the same result. I don't recommend replacing cornstarch where it's used in this book.
EGGS – I use large eggs in all my baking. They are standard and should be easily available. To bring them to room temperature quickly, submerge them in warm water for ten to fifteen minutes.
FOOD COLORING VERSUS GEL ICING COLORS – Both types of coloring are used in this book. Food coloring is often used in the cakes, while gel icing colors are used in the frostings. If you prefer, you can use gel icing colors in cakes as well. For more on coloring frostings, see here.
FRUIT – Pretty much all fruit used in this book is fresh fruit. If you choose to substitute frozen fruit, be sure to thaw it, drain it and pat it dry so that you don't have additional moisture, which could alter the outcome of the recipe.
HEAVY WHIPPING CREAM – You want to use heavy whipping cream rather than plain whipping cream. The fat content is higher and will hold up better as whipped cream.
INSTANT ESPRESSO COFFEE POWDER – Similar to instant coffee, instant espresso coffee is the same type of powdered coffee but stronger. If you can't find instant espresso coffee, you can substitute instant coffee, preferably a dark roast for stronger flavor.
MILK – For all of my baking I use 2 percent milk. You can also use whole milk. I do not suggest using low-fat milk. The fat in milk adds moisture, so without it you end up with a dryer cake.
OREO CRUMBS – These cookies typically cannot be purchased already crumbled. I buy the regular Oreos and crush them with a food processor. There is no need to remove the filling from the Oreos. If you get Double Stuf Oreos or Mega Stuf Oreos, you can reduce the butter by 1 to 2 tablespoons (14 to 29 g), as the filling from the cookies will help hold the crumbs together, and you won't need as much butter. You can also substitute them with another chocolate cream-filled cookie.
(Continues...)
Excerpted from Simply Beautiful Homemade Cakes by Lindsay Conchar. Copyright © 2016 Lindsay Conchar. Excerpted by permission of Page Street Publishing Co..
All rights reserved. No part of this excerpt may be reproduced or reprinted without permission in writing from the publisher.
Excerpts are provided by Dial-A-Book Inc. solely for the personal use of visitors to this web site.
Table of Contents
Contents
Title Page,Copyright Notice,
Dedication,
Introduction,
CHAPTER 1 The Best First Steps to a Beautiful Cake,
CHAPTER 2 Grand Simplicity: Icebox Cakes, Cookie Cakes and Single-Layer Cakes,
CHAPTER 3 Delightful Little Bites: Cupcakes,
CHAPTER 4 Towering Beauties: Layered Cakes,
CHAPTER 5 Lovely Frozen Treats: Ice Cream Cakes,
CHAPTER 6 Marvelous Sweets: Cheesecakes,
CHAPTER 7 Dress Up the Season: A Variety of Cakes for Your Favorite Holidays,
CHAPTER 8 Decorating Tips and Tutorials That Take Your Cake From Average to Beautiful,
Acknowledgments,
Index,
About the Author,
Copyright,
Related Subjects
Customer Reviews
Explore More Items
")
")

")


")
")


