Read an Excerpt
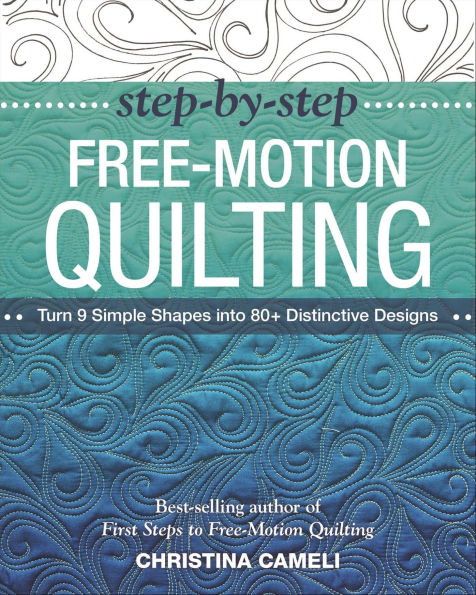
Step-by-Step Free-Motion Quilting
Turn 9 Simple Shape into 80+ Dictinctive Designs
By Christina Cameli, Teresa Stroin C&T Publishing, Inc.
Copyright © 2015 C&T Publishing, Inc.
All rights reserved.
ISBN: 978-1-61745-025-9
CHAPTER 1
The Elements
Following are the nine elements that together make up all the designs in this book. I've picked simple shapes that are easy to sketch. Keep in mind this idea of sketching. Free-motion quilting for most home quilters is more sketchy than precise. Don't stress.
CIRCLE
The circle is surely one of the most useful shapes in quilting. Circles have an attractive effect when quilted, and they are quite versatile for filling in space. Are your circles lopsided or oval sometimes? Mine too!
Occasionally you'll leave a circle open. Sometimes many circles will be joined together into pebbling or pebble lines. These types of designs are described further in Pebbling and Traveling.
CURVING LINES
Lines with gentle curves provide great texture and frequently get us from one place to the next in our designs. These lines don't need to be precise or perfect. Just head in the direction you want to go and let your line wiggle as much or as little as you'd like.
LOOP
Shaped like a cursive letter "e," loops are well loved by beginning quilters. They are sometimes tall, sometimes squat. You may string together several loops in a row.
DROP
The drop shape is pointed at one end and curved at the other. It can be fat or skinny as needed. Sometimes the point of the drop will be left open. Sometimes a drop will bend to one side. Open drop shapes can be easily joined in a fan arrangement or a vertical column.
SPIRAL
Spirals can take on a lot of looks and are great space fillers. Most often you will make a path into the middle of a spiral, come to a point, and then work your way back out in the open space of the inward spiral path.
If you're filling a space with a spiral, the spiral should go right up against the first edge you pass. But make sure to leave room along the opposite edge (as well as between the spiral revolutions) to allow space to work back out of the spiral.
Spirals can be just a hint of a whirl or tightly wound, or made skinny by traveling back out along the original inward spiral path. You will often use spirals in rows.
Occasionally, your design will depend on exiting the spiral along the inside or the outside. In these illustrations, the blue line travels along the inside and the red line travels along the outside of the spiral.
LEAF
At its simplest, the leaf design is two gentle curves that meet at a point. Occasionally you will keep the bottom ends of the curves apart to create an open leaf shape. Leaves are sometimes worked into flower shapes. Do remember that Mother Nature rarely makes her leaves exactly the same, so we needn't either.
Sometimes a gentle line up the middle of a leaf creates a center vein.
THE "S" CURVE
Unlike other curving lines, "S" curves have a regular, predictable undulation to them. They can still be imperfect; they just need to have a rhythmic back-and-forth pattern to make the designs work. Sometimes the "S" is dynamic and other times stretched out to just a hint of undulation. Sometimes "S" curves are mirrored to create a patterned effect.
ARC
An arc is a simple curve that returns to the line or level that it started from. Arcs can be shallow, tall, or anywhere in between. Arcs are often used in a row or along a curved path.
GRASS
The grass shape is created with two wavy lines that meet at a point. The bottom of the shape can be open or closed. The two sides of the grass blade do not need to be symmetrical. Grass shapes can be arranged to create a flower, and open grass shapes can join together in a column.
Things to Know
ABOUT THIS BOOK
First things first: I'll use the word "motif" a lot. To be clear, a motif is an individual unit that we repeat to create the quilting design. Motifs are made up from the basic elements introduced in the first chapter. Some motifs are simple (FIGURE A), while others are complex. FIGURE B
Repeat a motif in a particular way and you have a design. Each design in this book includes instructions and drawings to explain how the individual motif is formed. I show completed steps in black and the current step in color. This should help you identify where the line travels over previous parts of the design. Dotted lines show the next step. Arrows are used to show the direction the line is taking. FIGURE C
Most of these designs will work well in small or large scale. You may choose to quilt a design smaller for a small piece like a pillow, or larger for finishing a quilt. Designs worked on a small scale will create dense, high-impact quilting and the quilting will take longer to finish. Designs worked larger will finish quicker, but you may have less of the play of light and shadow in the finished quilted texture. You may also find yourself limited by how large you can make certain elements. If your design has a large circle or drop shape, for instance, you may be limited by how large you are able to comfortably create these shapes with the space you have available under your machine arm. I strongly recommend practice stitching to help determine the scale you want to work your design.
Finally, as you will see, my sketches in this book are just that: sketches. I let them be imperfect, and the beauty of the pattern still comes forth. I hope you can give yourself the same freedom to embrace irregularities. To that end, I have purposely focused on organic designs with some unpredictability. When variation is expected in the design, the stitching can be successful without being executed perfectly. The leaves or circles might be varying sizes, the arcs might not all match up, and the lines might wobble, but even with these irregularities the design should still work.
SKILLS FOR THE FREE-MOTION QUILTER
Traveling
The designs in this book are continuous-line designs. Working with a continuous line lets you quilt interesting designs without the impracticality of stopping and cutting your thread over and over. For many of the designs in this book, you will occasionally need to travel along an area you've already stitched to get to the next part of the design.
Here is the simplest example: a line of pebbles. You start by making one pebble. Then, to get to the other side of the pebble to start a new pebble, you travel halfway around the pebble along the circle you've already made. You continue that pattern, going one and a half times around each circle, to move in the direction you want.
With traveling you may not always hit the original line exactly. That's okay. When you step back from the quilting, these little inconsistencies will blend into your overall stitched pattern. Traveling is a skill, and, like all skills, it will take practice. If you're not happy with the quality of your traveling, choose designs that don't have much traveling.
Flexibility
Filling space evenly with a quilting design requires flexibility. Sometimes you'll need to make adjustments as you go to accommodate the space you have. You may make fewer petals than the motif calls for to fit in a tight space. You may add more leaves to keep your motif from finishing in the wrong spot. You may decide not to echo a motif because you're already in the right place to start the next one. Give yourself the freedom to adjust your design on the fly. The specifics of one motif or another are rarely obvious on the finished quilted piece. What comes forth is the overall texture. So adjust as needed and keep on quilting!
As you grow in other skills, such as foresight and familiarity with design forms, you may need less flexibility. While you are still new to free-motion quilting, though, please be easygoing. Perfectionism has the terrible side effect of taking all the fun out of quilting.
Echoing
Echoing is common in quilting designs. The play of light and shadow in an echoed design has great visual impact. We'll use that to our benefit in a number of echoed designs. When echoing, keep a consistent space between the original line and the echoed line. A loose consistency is preferred over rigid precision; just do your best. As I've mentioned, when you step back from your quilting, small imperfections tend to disappear.
Foresight
One of the ways in which free-motion quilting challenges us is that we have to decide where to go next in our designs as we cover the space to be quilted. Some designs make this easy. For instance, a line of loops goes in one direction. You make one initial direction decision and then just keep quilting in that direction. This makes designs with lines that go from one edge of the piece to the other attractive to new quilters: with fewer decisions to make, you can focus on the coordination aspect of free-motion quilting.
Some designs have a lot of possibilities. A basic pebbling design always has many options for where to place the next pebble. This makes it very accommodating. FIGURE A
Some designs have more limited possibilities. The fewer possible starting points for moving on to the next motif, the more attention you will need to pay to how you go about filling in your space.
The most challenging designs have even less flexibility. The motif has a set form, and wherever it ends is where you start the next motif. For these designs, a decision about which direction to take within the motif will affect where you find yourself once you've finished the motif. Thinking ahead to where you want to be when you've finished the current motif can help you work toward the areas you need to fill and avoid getting stuck in corners. Be aware of decision points in designs.
The decision point is mid design. The side you start the flower is the side you end the design.
The decision point is at the beginning. You end on the opposite side from the direction in which you begin drawing. As shown here, if you begin drawing toward the right, the design ends on the left.
Form Recognition
There are only so many ways to fit the same shapes together, and I bet that, flipping through this book, you've already noticed that some designs are similar to others. This is great! Because if you can see the similarities between two designs, you can use the familiarity you have with one design to help you quickly grow comfortable with a similar-but-not-the-same design. Designs that are formed similarly will fill in the space similarly. Not every design will fit easily into a category, but here are some basic forms to be familiar with.
Pebbling
Pebbling is simply stitching a bunch of circles nestled together.
NESTLED
Shapes squeeze together as close as possible, and each shape touches many others. The basic nestled design is pebbling. If you can cover space with pebbling, you should do fine with these designs: Ashore, Porthole, Diadem, Orbs.
BRANCHING
In these designs, a branch is formed, with extensions such as leaves or spirals to either side. When one branch is completed, the next branch is created, leading out from between extensions. If you understand the branching structure you can create many designs, including Trifles, Artemesia, Dainty, and Thicket.
EMERGING
In these designs, new motifs emerge from the space between two previously stitched motifs. The basic emerging design is the paisley pattern. In these patterns, you will notice that empty areas form where three or four motifs meet. A few of my favorite emerging patterns are Flourish, Enchantment, Gilt, and Bower.
EDGE-TO-EDGE
Edge-to-edge designs are attractive to new machine quilters. Being able to work in one direction minimizes how often you need to rearrange the quilt and takes some of the pressure off of figuring out how to cover the space evenly. If the lines travel essentially straight you do need to be vigilant to keep them on course, but you won't have to work around getting stuck in a corner.
Something to keep in mind for edge-to-edge lines is that, for larger pieces, you may have to quilt half of the piece by stitching from one direction and the other half by stitching from the other direction (such as when you've turned your quilt upside down to stitch the left half from the left side without the rest of the quilt under the machine arm). If you will need to do this to quilt your piece, be sure to practice sketching and stitching your design in both directions before you start.
When quilting a horizontal edge-to-edge design, you may wish to orient the quilt sideways when you stitch, so that while the pattern is horizontal on the quilt, you are working vertically in relation to the machine. This will allow you to quilt with less bulk under your machine arm. Some of the most striking edge-to-edge designs in the book are Sylph, Adrift, Spindle, and Lumen.
BACK-AND-FORTH ECHOES
In these designs, the final step is echoing around previous shapes. Some designs echo a prescribed number of times, and you will need to think ahead to make sure you end up on the desired side of the design. Other designs can be echoed a variable number of times, or only echoed partially, allowing you to easily reach the point where you want to start the next motif. With echoing designs, be sure to leave room to echo back when you work near a tight space. If you have a preference for echoing designs, you should love these designs: Midsummer, Flora, Spectrum, and Verdure.
WANDERERS
In these designs, a motif is created and then joined to the next by another element, such as wavy or loopy lines. The connecting element may take any direction, and the design wanders across the open space. If you've had success with basic meandering quilting you will easily take to wandering designs, such as Bauble, Whistle, and Dizzy.
CLIMBERS
Some motifs "climb" by linking elements from bottom to top. You end each design element on top, leaving you ready to start the next one. These designs are flowing and flexible. Some climbing designs in this book are Haven, Bountiful, Traipse, and Rampant.
FROM A DESIGN YOU LIKE TO A FINISHED QUILT
So what do you do when you've found a design you like? Here's my prescription for getting to know it.
To start, read the instructions for forming the basic motif. Then look at the design sample to understand how the motifs work together to create the design. Once you are comfortable with the basic structure of the design, move on to sketching it.
Sketching lets you practice creating the design in empty space, making sure you understand the path the design takes. When you sketch, you practice the spacing, proportion, and rhythm of the design. You learn how to keep the design even and avoid working yourself into a corner. I don't think I can overstate the importance of taking time to sketch your design with pen and paper. It really pays off when you sit down in front of a project to quilt. You are already familiar with the design, and you haven't used any fabric or thread to gain that familiarity.
Most of the designs in this book did not come out right the first time I sketched them, but after filling a few pages I got the feel for them. If you're getting frustrated with a particular design, try this trick: Photocopy the design and then use a colored marker to follow the design as it's drawn. You'll gain muscle memory for the design while seeing how the design works across the open space. After doing this, try sketching on a blank page again.
Once you can fill an entire sheet of paper with your design, you are ready to practice it with needle and thread. Try at least a few minutes of practice stitching before jumping into a whole quilt. This will let you become comfortable with the quilting movements and allow you to check that you've chosen the right scale for quilting your design.
Now you're ready to quilt! If you go through the steps above I think you'll be pleased with what you see when you start quilting your piece.
(Continues...)
Excerpted from Step-by-Step Free-Motion Quilting by Christina Cameli, Teresa Stroin. Copyright © 2015 C&T Publishing, Inc.. Excerpted by permission of C&T Publishing, Inc..
All rights reserved. No part of this excerpt may be reproduced or reprinted without permission in writing from the publisher.
Excerpts are provided by Dial-A-Book Inc. solely for the personal use of visitors to this web site.