


Fermentation on Wheels: Road Stories, Food Ramblings, and 50 Do-It-Yourself Recipes from Sauerkraut, Kombucha, and Yogurt to Miso, Tempeh, and Mead
256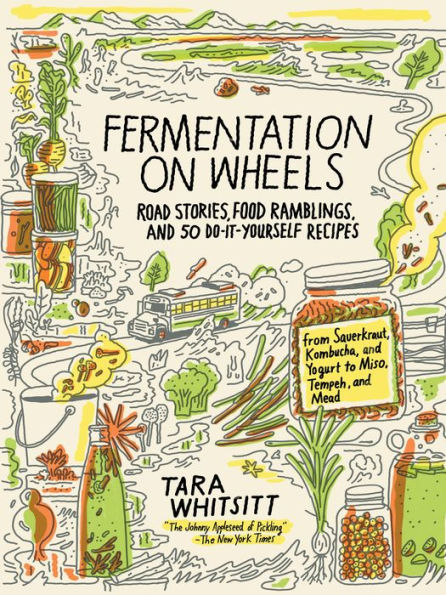
Fermentation on Wheels: Road Stories, Food Ramblings, and 50 Do-It-Yourself Recipes from Sauerkraut, Kombucha, and Yogurt to Miso, Tempeh, and Mead
256eBook
Related collections and offers
Overview
Three years ago, food activist Tara Whitsitt had a dream: to take to the road in a converted school bus and spread the gospel of kombucha, kimchi, and kefir nationwide. She would bring her microbe-dense delicacies, her expertise, and her generosity to food communities across the country. Her motto: Tasty food belongs to everyone.
In a 1986 International Harvester bus-turned-fermentation-lab, Tara took off from Eugene, Oregon, teaching her skills to curious attendees, hosting potlucks, and sampling the seasonal produce of each stop on her tour. The project accrued a following, and she gave it a name: Fermentation on Wheels.
Through her winning stories, illustrations, photographs, and fifty recipes, Fermentation on Wheels tracks the two-year. twenty-thousand mile journey that made Tara into a known apostle of outrageously delicious, creative, healthy, and sustainable fermented flavors--from sourdough to sauerkraut to wild berry wines. A practical and delectable cookbook, Fermentation on Wheels is also an inspiring celebration of how food traditions (and starter cultures) can bring people together, pollinate their minds, and change their lives for the better.

Product Details
| ISBN-13: | 9781632867926 |
|---|---|
| Publisher: | Bloomsbury Publishing |
| Publication date: | 09/19/2017 |
| Sold by: | Barnes & Noble |
| Format: | eBook |
| Pages: | 256 |
| File size: | 28 MB |
| Note: | This product may take a few minutes to download. |
About the Author
Read an Excerpt
Fermentation on Wheels
Road Stories, Food Ramblings, and 50 Do-It-Yourself Recipes from Sauerkraut, Kombucha, and Yogurt to Miso, Tempeh, and Mead
By Tara Whitsitt
Bloomsbury Publishing Plc
Copyright © 2017 Tara WhitsittAll rights reserved.
ISBN: 978-1-63286-792-6
CHAPTER 1
NAVIGATING FERMENTATION
Fermentation is one of the most fascinating, ever-present food processes, naturally occurring everywhere: the cheese in your fridge developing richer flavors; the yogurt left on your countertop overnight forming a layer of whey; the flour, water, and natural yeast intermingling to leaven dough. Microorganisms work hard, and they break down food matter whenever the opportunity arises. These hidden life-forms enhance food nutrients and contribute a diverse community of microflora to the miraculous microbiome inside you. And it all starts with a simple act in the kitchen.
You don't need sophisticated tools for fermentation. Only five years ago I was intimidated by home preservation, discouraged by pricey classes and kitchen apparatuses. One of the most difficult aspects of today's kitchen is the overwhelming variety of tools we think we need to master a home-cooked meal, not to mention the obscure tools we think we need for food preservation. Keep it simple. You don't need air-lock systems or fancy crocks for vegetable fermentation — your ancestors didn't fret when they packed twenty gallons of salty cabbage into a wooden barrel and left it in their root cellar to ferment in fall and enjoy through the next spring. The simple truth is that you can ferment one gallon of cabbage in a recycled glass jar with a rock as a weight and a tea towel secured on top. More isn't necessary.
Simplicity will be a running theme. But these pages will also explore fermented foods that require more commitment, practice, and kitchen means. I want to encourage you toward the rewards that come with such challenges. Most of the more complicated recipes in this book were first made with simple tools and by feel. They're a testament to the deep intelligence of age-old processes and the eagerness of microorganisms to thrive. Where there is a will (which all microbes have, and you are mostly microbe), there is a way.
This chapter introduces a few concepts, supplies, and ingredients — compiled from workshops I've taught, both in starter-culture fermentation and wild-vegetable fermentation — that will bring more ease to recipes in the following pages. Some concepts are expanded upon within the recipes where they specifically apply; but let this serve as a well-rounded guide for getting started. Most important, I encourage you to embrace creativity.
What Is Fermentation?
Fermentation is a microbial transformation in which sugars are converted into acids, gases, and sometimes alcohol, transforming raw or cooked foods into a more preserved state and giving them complex, unique flavors. During this transformation, microbes proliferate and create a diverse microcommunity, so your food is teeming with beneficial microorganisms. Sauerkraut, miso, and yogurt are common examples of fermented foods packed with helpful bacteria. When you eat fermented foods, you introduce these beneficial microorganisms to your system, or your microbiome, located in the gut.
Why Fermentation?
Microbe-rich fermented foods and drinks offer a healthy alternative to the more widely available processed and preserved foods sold today. When you introduce beneficial bacteria to your body, you strengthen your gut, improve immunity, and better your digestive health. You also encourage a food culture that promotes diversity and health for your inner ecosystem, which like all ecosystems needs a balance of microbes to thrive. Microorganisms are essential — they're the underlying connection between all life-forms.
You can certainly go out and buy a jar of sauerkraut or miso from the store, but experiencing fermentation brings you closer to life forces that bridge communities of soil, plants, and animals. These small organisms are responsible for a healthy planet, too. Working directly with fermentation has taught me to appreciate the grandeur of the natural world at a more intimate scale — fermenting in your own kitchen is one of the easiest, most delicious, and fascinating ways to experience an ecosystem firsthand. Growing food has a similar effect. There, we initiate life; when we ferment, we cultivate and nourish ourselves with that life. It's an immensely rewarding and empowering process to achieve in a small home kitchen.
Wild Fermentation Versus Fermentation via Inoculation
When you allow fermentation to happen naturally, without the addition of microorganisms, such as bacteria or yeast, it's called wild fermentation. Vegetable fermentation is a perfect example of wild fermentation, for it depends on the organisms present on your vegetables; with the addition of a salty massage and submersion in brine, Lactobacillus flourishes. Though an exact flavor is unpredictable from batch to batch because vegetables from different sources will vary in microflora, vegetable ferments are reliably tangy and tasty. If you make something you find especially tasty, you can save the brine and use it to inoculate future batches. This particular method is called backslopping, and this brine is an example of a starter culture.
Starter cultures are communities of specific microorganisms used to inoculate foods — they jump-start fermentation and introduce desired fermentations and flavor profiles. Bacteria and yeast impact flavor, and when you work with a community of bacteria and yeast you know and trust, you're able to reproduce familiar flavors. Flavor profiles of starter cultures can change over time, though, based on environment and the ingredients you use to keep them going. San Francisco sourdough, for example, undergoes much change if you ship it to New York City and feed it with rye flour rather than white flour. Different microbes dwell in different environments and food mediums and quickly impart their own flavor qualities — that's part of the experimental fun.
All starter cultures, just like the backslopping brine, once had a botanical source. Today scientists produce starter cultures in laboratories, to mimic the unique communities of bacteria and yeast found in the wild. Some starter cultures are robust with long life spans (sometimes thousands of years), while others are less robust and will produce just two to three fermentation cycles. More often, the shorter life cycles are found in laboratory cultures. I have yet to work with a starter culture sourced from nature that has failed to infinitely reproduce when properly cared for.
This book includes a guide to sourcing starter cultures (page 12). Once you get your hands on a starter culture, it's important to care for it with regular feedings or store it properly when you aren't using it. Recipes in this book will guide you through the particulars of different starter cultures — each has unique needs.
In the Kitchen
The supplies listed below apply mostly to vegetable and alcohol fermentation, but they will also get you started with an array of other ferments. An incubation chamber, thermometer, and scale are included for accuracy measures, but aren't necessary for most of these recipes. Each recipe contains notes for the materials you will need.
Fermentation Vessel. For three reasons my favorite vessel is a glass gallon jar: costeffectiveness, visibility, and quantity. Glass jars are great when doing smaller experiments, too. The opening of a jar should always be wide enough for your hand to fit. When packing vegetables, make sure that they are fully submerged in brine. During fermentation, you may want to give the ingredients a push downward if you notice they're no longer submerged. This will prevent oxidization or mold growth. You may also use a ceramic crock or food-grade plastic containers, but I recommend starting out with glass containers so you can see what's going on and get to know your ferments better. Visibility will give you a sense of pace and let you know when the ferment needs maintenance. And, oh, the joys of viewing the color changes and carbon dioxide activity — the whole mesmerizing fermentation process!
Ceramic, Glass, or Plastic Bowls. A large bowl is the best vessel for massaging vegetables with salt or simply mixing ingredients. My favorite bowls are stainless steel and glass bowls, but use what you like so long as you transfer the ingredients to a proper vessel for fermentation. Steer clear of wooden bowls, as they will absorb the brine you're working to promote.
Weight. Many food fermentations, including vegetable ferments, are anaerobic — they require the absence of oxygen. Hence the need for weights to keep ferments submerged below brine. I use nonporous river rocks as weights — washed, scrubbed, and boiled in water for fifteen to twenty minutes. You may also use a flexible plastic yogurt lid and place a glass jar of water on top of it. With smaller batches (one-half gallon or less), I simply use the outer cabbage leaves or the ends of root vegetables, which would otherwise be compost, to pack the top of my ferment. If they oxidize or show mold growth during fermentation, I simply toss them.
Cover. Once my ferment is properly packed and weighed in its vessel, I cover the jar with a tea towel and secure it with a rubber band. This keeps dust and bugs out. You can also use a plastic Ball-jar lid. Air-lock systems are also popular because they keep outside bacteria and yeast out of the equation. Steer clear of metal covers as they will corrode when in contact with high levels of salt and can introduce undesirable flavors to dairy and beverage ferments.
Bottles. When fermenting beverages, you will transfer them to a bottle for storage. Different beverages call for different bottles, but there are no strict rules. You can purchase bottles at a home-brew store, but I recommend using recycled bottles. It's much more cost-effective. I prefer sling-top bottles for varieties of fermented soda because they are airtight and thus also useful for secondary fermentation, which you can learn about on page 62. Wine bottles are great for wine and beer bottles for beer. You can learn about the wine bottling process on pages 138–39. This guide includes tips for cleaning and sanitizing recycled bottles, too.
Carboys and Gallon Jugs. Most beer and wine recipes in this book call for a gallon jug, but you can use a carboy if you'd like to scale up. A carboy is a large-quantity glass fermentation vessel with a narrow neck and mouth, for use with an air lock and bung. You can use a food-grade plastic carboy, too.
Air Lock and Bung. Air locks are nifty and sometimes necessary in alcohol fermentation. My recipes for cider, wine, and beer include the use of an air lock, which allows the escape of CO2 but doesn't let oxygen in. These ferments are especially sensitive to outside bacteria and yeast, which can sometimes impact the flavor negatively. A bung is a rubber cork that secures the air lock to your vessel.
Bottle Brushes. These brushes are bendable, come in varying sizes to use with jugs and carboys, and are helpful for cleaning hard-to-reach spots of narrow-necked vessels.
Hydrometer. This inexpensive tool measures the alcohol by volume (ABV) of a beverage, which varies greatly depending on the sugar content. Most all of my recipes call for honey or fresh fruit — the sugar content of your ingredients may vary from mine, as different honey and fruit varieties will vary slightly in sugar content. If you're one for accuracy and knowing what you're going to get, a hydrometer is a must-have brewing tool. Noting your brew's potential ABV percentage is important for accuracy measures and because different yeast strains have different ABV tolerances. If you use a yeast strain that can only consume an ABV of 13 percent, and your hydrometer reads that your brew has the potential to ferment an ABV of 15 percent, the undigested sugars in the alcohol will result in a sweeter brew.
Home-brew Funnel. A home-brew funnel is the ultimate tool for fermented beverages. It has a wide opening, fits inside smaller-mouthed vessels, and sports a removable screen. Use it to strain off liquid from herbs, fruit, and starter cultures. It's useful for making beer, dairy kefir, kombucha, water kefir, and wine. These funnels are under $10 and available at your local homebrew store or online.
Racking Cane and Siphon. Use a racking cane to transfer a beverage from one vessel to another. This tool includes a plastic tip that discourages the sediment of your last batch from entering your new vessel. It's also a useful tool when bottling beverages.
Incubation Chamber. Incubation chambers are handy for the amazake, tempeh, and yogurt recipes. For years I used a cooler with either hot water directly in it or hot-water bottles surrounding the ferment. I built an incubator this year with a broken minifridge, a cheap thermostat, and a lightbulb as my heat source. Simple makeshift incubators call for more maintenance, whereas if you have the resources to build a more advanced chamber (or the money to buy one) much less maintenance is involved. I'll elaborate more on incubation on page 164.
Thermometer. A simple meat thermometer with a probe is inexpensive and will allow you to read temperature during incubation. I have graduated to an iDevices digital thermometer with two probes. It's Bluetooth compatible — this means I can program my phone to warn when the temperature is too low or too high. I love it.
Scale. A small, cheap spring scale is great. A lightweight digital scale that can read weight in pounds, ounces, and grams is even better.
Quality Control in Home Fermentation
Environment. Keep the scene clean. Quality often boils down to cleanliness and fresh ingredients. Wash your hands, wash your utensils, and rinse your produce. Sterility isn't necessary.
Temperature Stability. My ideal fermentation temperature range is 68º to 76º F, give or take. Higher temperatures will result in faster fermentation, and lower temperatures in slower fermentation. Keep temperature as stable as possible, and preferably lower than 76º F. I don't recommend temperatures over 90º F, as overly quick fermentation sometimes results in an undesirable texture, and very high heat can even be deadly to microbes. Fermented foods that require incubation, such as tempeh, are an exception and have certain heat tolerances, too. (See incubation on page 164.)
Time. Fermentation takes time — let it teach you the joys of patience. So you know what you're in for, all the recipes here note time frame. Some will ferment in less than forty-eight hours (yogurt, tempeh, water kefir), others may take weeks (many vegetables, kombucha), and a few a year or two (miso). All are worth the wait; in fact, you may find with time you develop an attachment to those ferments you've waited longest for, as they are some of the richest, most complex-flavored ferments to ever hit the palate. Great rewards come with time.
Ingridients
Dairy, Fruits, Vegetables, Legumes, Grains. Choose quality ingredients from a source you trust. Local and organic foods will contain the most desirable microflora — they're generally fresher and have been handled less. This isn't to say you can't ferment with Dumpster-dived or nonorganic ingredients, but I recommend going for quality. I also recommend you support your local farmer.
Water. Pure water can be difficult to source in the city since tap water is chlorinated. Boiling water will not diminish chlorine, but you may let water sit for a few nights and the chlorine will evaporate. I go for filtered, spring, or well water when fermenting, not because tap water won't work, but because it's best to use ingredients that are close to nature.
Additional Ingredients (Salt, Sugar, Fish Sauce). Again, stay close to nature. Unrefined, additive-free ingredients offer quality and are cost-effective. I refer to the list of ingredients on a package. Steer clear of any unrecognizable ingredients.
Salt
You may ferment with most any kind of salt. I usually go for cost-effectiveness and buy unrefined sea salt in bulk, but I'm happy to ferment with fancy Celtic sea salt on occasion. Iodized and pickling salt are not preferred choices because they have additives that might introduce unpleasant flavors or inhibit microorganisms, but based on my research they'll generally work.
Salt has many important functions, especially in vegetable fermentation. It inhibits the growth of undesirable bacteria and gives Lactobacillus the upper hand. In addition to being a halophile (salt-loving organism), Lactobacillus is a competitive organism — it keeps the undesirable bacteria at bay (see note on the resilience and competitiveness of Lactobacillus on next page). During vegetable fermentation, dry salting draws water and creates brine convenient for anaerobic fermentation. Salt also affects flavor. You can get away with using little salt if your ferment is in an anaerobic environment, below the brine. My vegetable fermentation salt spiel: if you don't like the level of saltiness before you ferment it, you probably won't like it once it's fermented.
(Continues...)
Excerpted from Fermentation on Wheels by Tara Whitsitt. Copyright © 2017 Tara Whitsitt. Excerpted by permission of Bloomsbury Publishing Plc.
All rights reserved. No part of this excerpt may be reproduced or reprinted without permission in writing from the publisher.
Excerpts are provided by Dial-A-Book Inc. solely for the personal use of visitors to this web site.
Table of Contents
Contents
Navigating Fermentation, 1,Prelude: Dreams & the Universe, 15,
Life Is a Potluck, 29,
Culturing the Southwest, 54,
Home, Sour Home, 65,
The Deepest South, 77,
Everyone Prays in Appalachia, 96,
The Crowded Northeast, 109,
New England Revelations, 126,
Fall Restoration, 145,
Re-wilding New York City, 158,
Discovering the Midwest, 176,
Scenes from a Middle-American Farm, 201,
Driftless, 211,
Staring at the Sun, 231,
Acknowledgments, 238,
Index, 240,
Index of Recipes, 246,