


Overview
Hang them on Christmas tree branches or evergreen boughs during the holiday season. Use them to dress up holiday packages or a holiday table centerpiece. Or frame these exquisite works of art and give them to friends and family as gifts at any season of the year. This excellent guide shows you how to tat 40 distinctive snowflake designs in many different sizes — each a model of elegant craftsmanship.
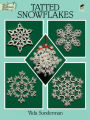
Needlecraft designer Vida Sunderman has provided easy-to-follow instructions to help needleworkers bring each of these beautiful designs to a happy conclusion. Forty close-up photos show the completed designs, including two three-dimensional snowflakes and some enhanced with ribbons, beads, jewels, or glitter. Some of the designs are suitable for beginning tatters, while others require intermediate and advanced skill levels. Every one of them, when completed, will add a personal touch of elegance to the holiday season.

Product Details
| ISBN-13: | 9780486141114 |
|---|---|
| Publisher: | Dover Publications |
| Publication date: | 02/09/2012 |
| Series: | Dover Crafts: Lace |
| Sold by: | Barnes & Noble |
| Format: | eBook |
| Pages: | 32 |
| File size: | 5 MB |
Read an Excerpt
Tatted Snowflakes
By Vida Sunderman
Dover Publications, Inc.
Copyright © 1995 Vida SundermanAll rights reserved.
ISBN: 978-0-486-14111-4
INTRODUCTION
Today there is a renewal of interest in tatting—the art of making lace with a shuttle, thread and your fingers. The lace is fragile and delicate in appearance, but very strong. The fragile appearance is very appropriate for snowflakes, giving them a lacy, snowy look.
Shuttles
There are several kinds of shuttles available today in craft and variety stores. Here are a few of my favorites.
Susan Bates has a small plastic shuttle with a sharp point that works well with tatting thread or other fine thread. The red Boye shuttle is a medium-sized shuttle with a point and is my favorite for size 10 or 20 thread. Tatsy makes a large shuttle suitable for heavier threads or fine yarn. It does not have a point on it, so a crochet hook is needed for joining rings or chains to picots.
All of these shuttles are made with a shank that has a hole in it to fasten the thread. The thread is wound around the shank.
There are also metal shuttles available with removable bobbins. The thread is wound on the bobbin, which is then inserted into the shuttle. Extra bobbins may be purchased, so the thread can be changed by changing the bobbin. These shuttles generally have a hook on the end.
Other types of shuttles are available in a wide range of materials from plastic to silver.
Thread
Thread that is smooth and strong works best for tatting. Most crochet threads, available in craft and variety stores, are suitable for tatting. The size of the thread used determines the size of the finished snowflake. Size 10 or bedspread-weight thread makes a large-size snowflake. Medium-size snowflakes can be made with size 20 or 30 crochet thread. Miniature snowflakes, dainty and fragile in appearance, are made with tatting thread (size 70 or 80). Specialty threads can be used to give a distinctive look to your work. Ribbon floss, for example, gives a soft, satiny finish.
Learn How to Tat
Rings, chains and picots are the basic components of tatting. There is just one basic stitch—the double stitch. The double stitch is made in two parts around a base thread.
To start tatting you will need a shuttle, two contrasting colors of size 10 or bedspread-weight thread, small scissors and a small crochet hook if your shuttle does not have a hook or point on it. A sewing needle to pick out the stitches when a mistake is made is helpful, along with a lot of patience, practice and persistence.
Start learning to tat by making a chain. A chain requires a shuttle thread and a base or ball thread. We will use white and blue thread for our example. Wind the white thread onto the shuttle. The blue thread will be the base or ball thread. Tie the ends of the white and blue threads together with a square knot (page 6). Hold the knot between the thumb and index finger of your left hand. Place the blue thread over the fingers of the left hand and wrap it around your little finger four or five times. Hold the shuttle between the thumb and index finger of your right hand in a horizontal position, with the point toward your left hand and the thread coming from the back of the shuttle (Fig. 1).
To make the first half of the double stitch, put the thread from the shuttle over the fingers of your right hand, then slide the shuttle under the base thread between the index finger and the middle finger of your left hand (Fig. 2).
Bring the shuttle back over the base thread and through the loop formed by the shuttle thread that was over the right hand (Fig. 3).
Now it is necessary to transfer the loop to the base (blue) thread that is over the fingers of your left hand. To do this, drop the middle finger of the left hand slightly and pull the shuttle thread taut with the right hand. The thread will snap, forming a loop in the base thread. Raise the middle fingers of the left hand to slide the loop up to the knot between the thumb and index finger. This is the first half of the double stitch (Fig. 4).
To make the second half of the double stitch, slide the shuttle over the top of the base thread between the index and middle fingers of the left hand (Fig. 5), then slide it back under the thread and through the loop of shuttle (white) thread below the fingers (Fig. 6).
Transfer the loop to the base thread as before. Slide the loop next to the first half of the stitch. This completes one double stitch (Fig. 7).
To make a ring, only the shuttle thread is needed. Wind the shuttle, leaving 18" of thread free. Grasp the thread 3" from the end with the thumb and index finger of your left hand. Wrap the thread over and around the fingers of the left hand, holding it between the thumb and index finger. The thread will make a complete circle around your fingers (Fig. 8).
Make the double stitch as for the chain. If the stitch is made correctly, it will move on the base thread. Keep making double stitches around the base thread as specified in the pattern. As you need more thread around your fingers, unwind it from the shuttle and pull on the thread between your thumb and little finger. If there is too much thread around the fingers, pull on the shuttle thread to make the ring smaller. When the specified number of stitches has been made, pull on the shuttle thread to form the stitches into a ring.
Picots
A picot is a loop of thread between two double stitches. Picots are used as a decoration, or to join rings and chains to each other, helping to form a design. The length of a picot depends on the size of the thread used. Heavier thread takes a longer picot, while a smaller picot is made with finer thread. The length of a picot used for decoration is a matter of choice.
The picot is formed by leaving a space between the double stitches. To practice it, make 2 double stitches on a ring, then make the first half of the next double stitch, stopping ¼" from the previous double stitch. Make the second half of the double stitch (Fig. 9). Slide this double stitch next to the previous one, forming a loop called the picot (Fig. 10).
The picot spacing given in a pattern is the amount of space that is to be left between double stitches. Using a guide, it is easy to make long picots all the same length. For 1" spacing, use a small ruler or stick as a guide. Place the ruler between the base thread (thread over your fingers) and the shuttle thread, next to the last stitch made, then make the next double stitch. Remove the ruler and push the double stitches together, forming the picot.
Wooden ice cream sticks make a good ½" guide, or you can cut a strip about 2" long and the desired width from a plastic lid.
Reverse Work
To reverse your work, turn it upside down so that the base of the ring or chain is at the top. You usually reverse the work between rings and chains so that the stitches are facing the proper direction (Figs. 11 and 12).
Joining
To join one ring or chain to another, draw a loop of thread through the joining picot large enough for the shuttle to slide through. Slide the shuttle through the loop (Fig. 13). Pull the shuttle thread next to the picot so that it resembles the first half of the double stitch. This joining stitch counts as the first half of the next stitch. Make the second half of the double stitch. This stitch counts as the first stitch of the next group of stitches.
Fold-Over Join
A fold-over join is used to join the last ring or chain of a motif to the first ring or chain of the motif. Fold the first ring over from right to left above the joining picot. Insert the hook or point of the shuttle under the joining picot of the first ring or chain, make a twist in the picot and draw the base thread (the thread over your fingers) through the picot, making a loop large enough for the shuttle to go through. Insert the shuttle through the loop and draw the thread up to the joining picot to form the first half of the double stitch. Complete the ring or chain.
The Square Knot
A square knot is used to tie the shuttle and ball threads together, to tie the threads together at the end of a project and to join a new thread when the shuttle is empty and more thread is needed.
To practice making a square knot, use a white thread and a dark-colored one. With the dark thread in your right hand and the white in your left hand, cross the white thread over the dark thread. Wrap the end of white thread around the dark thread. Cross the ends of the threads again, having the white thread over the dark thread. Wrap the end of white thread through the loop formed and around the dark thread. Pull ends together tightly. If a square knot is tied correctly it will not come undone. Fig. 14 shows the square knot before the ends are pulled together.
If you need to join a new thread in the middle of your work, it is best to tie it on after a ring or chain is made. Clip the ends of the threads about 1 ½" long and work them into the next ring or chain as it is being made by drawing the end through the loop in the base thread. Do this for 3 or 4 stitches. A new thread cannot be tied on in the middle of a ring since the knot will not pull through the stitches when the ring is closed.
Using Two Shuttles
Sometimes, in order to make the stitches lie flat, it is necessary to use two shuttles. Either shuttle can hold the base thread. The shuttle designated for use in the instructions is the active shuttle, or the one used in the right hand. The other shuttle is used as the base or ball thread.
To identify which shuttle is to be used as #1 or #2, use shuttles of different colors or mark them with small pieces of masking tape.
The Continuous Thread
Mlle. Riego, an English needlework artist, wrote eleven tatting books between 1850 and 1868. She developed many techniques that are still used today. One of her most important developments was the use of a continuous thread. After winding the shuttle, she did not cut the thread from the ball. Instead, she started to tat in the middle of the thread between the shuttle and ball. Using the continuous thread method eliminates the need to finish two ends of thread. The fewer ends you have, the neater your work.
The patterns in this book use the continuous thread method by stating the amount of thread needed for the shuttle. Measure the amount of thread needed for the shuttle and tie a loop loosely at this point. Wind the thread on the shuttle, leaving 18" free to wrap around your fingers. Do not cut the thread if the ball thread is to be used. Untie the loop and start tatting at this point.
If two shuttles are used, measure the correct amount of thread for the first shuttle and tie a loop loosely at this point. Wind it on the shuttle, leave 18" free. Starting at the loop, measure the yardage needed for the second shuttle and cut it from the ball. Starting with the cut end, wind this thread on the second shuttle, stopping 18" from the loop. Untie the loop and start tatting at this point. If two colors of thread are used, you cannot use the continuous method, because the threads will have to be tied together to start tatting.
The amount of thread needed on a shuttle will vary if a different size thread is used. A finer thread takes less, a heavier thread takes more. The size of the picots can also vary the amount of thread needed.
Correcting Mistakes
Tatting does not unravel; each stitch is a knot. If a mistake is made, and just a few stitches need to be undone, the stitches may be picked out with a sewing needle or the point of the shuttle. The shuttle must be reversed through the enlarged stitch.
If there is a only a small amount of thread on the shuttle, unwind it, and pull the base thread backward through the stitches until the mistake is undone.
It is difficult to open a ring, but it is possible. Hold the ring in the same position as when you made it. Separate the stitches at a picot and pull on the base thread between the stitches until you have a small loop. Then pull on the base thread where the first and last stitches of the ring meet until the loop is large enough for the shuttle to pass through. The stitches will then need to be undone one by one.
If a mistake is made earlier in the snowflake, cut the stitches after the mistake leaving 2 or 3 rings and chains. Do not cut picots. Pull the base thread from the rings and chains until you have undone the mistake. Tie on a new thread and continue making the snowflake.
Finishing Ends
When a snowflake is completed, cut the thread leaving 4" ends; tie them in a square knot. With a small sewing needle and matching thread, whipstitch the ends to the back of the snowflake for 3/8", working each end in a different direction. Cut the ends close to the snowflake.
Another method of finishing is to glue the ends to the back of the snowflake. Cut the ends to 3/8". Squeeze a small amount of glue on a piece of paper and, using a toothpick, spread the glue on the snowflake in the appropriate place. Hold the ends in place until they are secure.
If a heavier thread is used, cut the thread leaving 4" ends; tie in a square knot. Unwind the end of thread and use one strand threaded on a small sewing needle to whipstitch the rest of the thread to the back of the snowflake for 3/8". Work the thread on the needle under 2 stitches. Repeat with the other end of the thread. Cut the ends close to the snowflake.
Laundering Snowflakes
To launder snowflakes, use a small jar or plastic container with a tight-fitting lid. Add softened lukewarm water and a mild detergent or soap such as liquid Woolite or Ivory Flakes. Add a gentle bleach if the snowflake is stained or discolored. A natural bleach is lemon juice and water. Hydrogen peroxide will remove some stains. Shake the jar well to dissolve the soap. Add the snowflake and shake well. If the snowflake is stained, leave it in the solution until the stain disappears, but be sure to check it often. Do not bleach any longer than necessary. Rinse by filling the jar with cold water and shaking the snowflake in it. Repeat two or more times. Place the snowflake between layers of a Turkish towel or between white paper towels to remove excess water; do not wring or twist. Place the snowflake on a padded surface or towel; shape and straighten picots while the snowflake is still damp or starch and block if desired.
Blocking Snowflakes
Blocking gives your tatting a professional finish.
Copy the appropriate blocking diagram on page 8 onto white paper. If the snowflake measures more than 3" across, extend the lines as long as necessary.
Laundry starch, corn starch, sugar starch or fabric stiffener purchased at variety or craft stores may be used to starch the snowflakes. White glue diluted with an equal amount of water is also suitable. Saturate the snowflake with the starch solution. Remove excess starch by placing the snowflake between layers of white paper toweling and patting it. Do not wring or twist.
Place the blocking diagram on a padded surface and cover it with plastic wrap. With rustproof pins, pin the snowflake over the diagram. Straighten the picots. Let the snowflake dry completely before removing it. Laundry or cornstarch may be dried by ironing. Sugar starch must be air dried, but a blow dryer may be used to hasten the process. If you have used a fabric stiffener, follow the directions on the bottle.
Working With Beads
To string small seed beads (known as rocaille beads) onto size 10 thread, dip the end of the ball thread in white glue for 2". Let it dry completely. Before starting to tat, use the glued end of the thread as a needle and string the beads on the ball thread. If the end becomes frayed, just snip it off. Wind the amount of thread needed onto the shuttle, moving the beads along the thread. Do not cut the thread between the shuttle and ball thread.
To make a chain with beads, the beads are used from the ball thread. A few beads are held on the thread on the back of the fingers of the left hand between the index and little fingers. Following pattern directions, a bead is pushed up to the last double stitch made and is held in place by the next double stitch. More beads are moved up to the back of the fingers as needed.
To use beads in a ring, string them onto the shuttle thread. A large shuttle works best. Estimate the amount of thread needed between beads and wind this on the shuttle. Then move a bead or the number of beads needed in a group onto the shuttle. Repeat the process until all beads are used. Keep the beads on the shuttle until one or a group is needed.
Decorating with Snowflakes
Use your imagination and dream up the many places you can use snowflakes. Here are a few suggestions.
• Snowflakes give a lacy, frosty look to a Christmas tree.
• Miniature snowflakes can be used to decorate a small artificial tree.
• Have a gift tree of snowflakes and let each guest pick one from the tree. It saves time, work and the cost of wrapping gifts.
* Tie snowflakes evenly spaced on a red ribbon to make a garland. Fasten the garland to the mantel of a fireplace or hang it in a window.
* Scatter several small suction cups with hooks on a window. Hang snowflakes on the hooks.
* Decorate Christmas packages with snowflakes. Glue them on in only a couple of places so they can be removed and used as a decoration by the recipient.
• Glue a miniature snowflake on a sheet of stationery to make a unique Christmas letter.
• Enclose a snowflake in a Christmas card for special friends.
• Use a floral pick to hold a snowflake and tuck it in a poinsettia plant or flower arrangement.
• Tack small snowflakes around the base of a candle with small craft pins to make a centerpiece.
• Lay a wide red ribbon down the center of your table and place snowflakes on top for a festive touch.
(Continues...)
Excerpted from Tatted Snowflakes by Vida Sunderman. Copyright © 1995 Vida Sunderman. Excerpted by permission of Dover Publications, Inc..
All rights reserved. No part of this excerpt may be reproduced or reprinted without permission in writing from the publisher.
Excerpts are provided by Dial-A-Book Inc. solely for the personal use of visitors to this web site.
Table of Contents
Contents
Title Page,Dedication,
Copyright Page,
Introduction,