


eBook
Available on Compatible NOOK devices, the free NOOK App and in My Digital Library.
Related collections and offers
Overview

Product Details
| ISBN-13: | 9781596359635 |
|---|---|
| Publisher: | Annie's |
| Publication date: | 01/01/2015 |
| Sold by: | INDEPENDENT PUB GROUP - EPUB - EBKS |
| Format: | eBook |
| Pages: | 64 |
| File size: | 23 MB |
| Note: | This product may take a few minutes to download. |
About the Author
Read an Excerpt
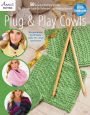
Plug & Play Cowls
By Annie's
Annie's
Copyright © 2014 Annie'sAll rights reserved.
ISBN: 978-1-59635-963-5
CHAPTER 1
Build Your Own Cowl
Whether you have a cowl shape in mind, a couple of skeins to use up, or a cool stitch pattern to try, the design process starts with three elements: shape, yarn and a stitch pattern.
Shape
Deep or shallow, narrow or wide, multiple or single wrap, with a twist or without, hug the shoulders or hug the neck — the options for cowl shapes are endless. Browse Pinterest, look at magazines, search Ravelry, and of course, look through the patterns in this book!
Scribble down the measurements (length and width, depth and circumference) of shapes you like. Use something you already own as a template, or hold a tape measure to your body in front of a mirror to see what works for you.
Yarn
Cowls are a wonderful way to use up an extra ball or two in your stash. But like scarves, they can use more yarn than you think. A close-fitting neck warmer can take as little as 100 yards (if using big lacy stitches!), while a long, wide infinity scarf can take as much 800 (or more, if knitting cable patterns).
Check how many yards you have of your chosen yarn and compare it to the requirements of similar projects. Leave yourself some wiggle room so you don't run out of yarn, measuring your project as you knit it to double-check. If you have two balls of yarn and your fabric measures 8 inches after using up the first ball, you will run out of yarn before finishing the 20-inch cowl that you planned. Have a backup plan; you could shorten the piece, work an edging in a contrasting-color yarn, or rip back and make your fabric narrower.
Stitch Pattern
Stitch patterns are what give knitted fabric its texture, its unique appearance and its character. This book is chock-full of unique and interesting patterns to try! Each chapter is organized by the number of stitches in each pattern repeat, which makes it easy to substitute and combine patterns.
What's a pattern repeat? A pattern repeat is a group of stitches (knits, purls, increases, decreases and other stitch manipulations) that repeats across the length and width of the fabric. The number of stitches and rows in each group is said to be its repeat. For example, seed stitch has a 2-stitch repeat ("multiple of 2 sts" notation in the stitch instructions) and a 2-row repeat. Linen stitch also repeats every 2 stitches, but has a 4-row repeat.
Sometimes a pattern repeat is not symmetrical. When repeats are lined up next to one another, either as stitches or rows, one end does not appear the same as the other; in these cases, we can't say a pattern is simply a multiple of 4 stitches. The extra stitches that provide visual balance must be included in the instructions and are the "+" numbers you see in repeat notations. For example, when worked flat, 2 x 2 rib is a "multiple of 4 sts + 2." The last 2 knit stitches balance the 2 knit stitches at the beginning of the row. You can see the visual balance in the instructions: "k2, *p2, k2; rep from * to end." The same principle holds for row repeats.
Balancing stitches and rows can almost always be eliminated if you plan on working in the round or grafting ends together. To check your pattern, chart it on a paper strip and bring the sides or ends together — how do the pattern stitches or rows best fit together?
Shape, Yarn & Stitch Pattern: Now Swatch!
Cast on 4 to 6 inches' worth of stitches (see Nuts & Bolts), and make a swatch 4 to 6 inches tall; in other words, knit a piece of fabric that's big enough to tell you how your finished cowl might look and feel. Experiment with cast-on and bound-off edgings and try different selvage treatments on either side of the swatch.
While you swatch, think about construction methods:
Do you want to work in the round? Is the stitch pattern simple to convert? What about working flat, and grafting the ends together — or button, zip or tie the ends together? What does the pattern look like on its side? Should you work lengthwise (lots of stitches, fewer rows) or widthwise (fewer stitches, many rows)? Is the stitch pattern reversible — would it lend itself to a being a moebius? Do you want to sew one end to the opposite edge, as with the Lace Sampler on page 41?
The time you spend swatching will fly by as you ponder the possibilities.
Nuts & Bolts
Yarn labels are your starting point; they almost always include "suggested gauge" information. This is the number of stitches and rows the average knitter will use in a 4 -inch square to make a sweater-appropriate fabric in stockinette stitch (for example, 20 sts and 28 rows); the label also suggests a needle size to achieve this gauge with the yarn.
Reduce the suggested gauge numbers down to the number of stitches and rows per inch (SPI) by dividing the numbers by 4:
20 sts ÷ 4 inches = 5 sts per 1 inch (5 SPI)
This number is the stockinette stitch gauge of the yarn. To make a stockinette stitch swatch 6 inches wide, multiply the SPI by the desired number of inches:
5 SPI x 6 inches = 30 sts
This rough number needs to be adjusted based on the stitch pattern repeat. Let's use the Mira Lace (multiple of 8 sts + 2) pattern on page 29 as an example:
[ILLUSTRATION OMITTED]
30 sts ÷ 8 sts per repeat = 3 full repeats, with 6 sts left over
3 repeats x 8 sts per repeat = 24 sts
24 repeat sts + 2 balancing sts = 26 sts
OR, bump up the swatch size by 1 repeat:
4 repeats x 8 sts per repeat = 32 sts
32 repeat sts + 2 balancing sts = 34 sts
Casting on either 26 or 34 stitches will produce a visually balanced swatch in the chosen stitch pattern. Add extra stitches for any edgings you want to try, and cast on.
The same math applies vertically to row repeats. The nice thing about rows? You can usually just knit more of them to make your piece long enough.
Once you're done with your swatch, wash and block it.
Do you like the fabric that you've made? If yes, you're good; you just need to work the math for your desired measurements (see Build Your Own Cowl on page 7) using the actual gauge. However, if you want denser fabric, work another swatch using smaller needles. And if you think that a looser fabric would be better for the cowl that you have in mind, swatch again using larger needles. Once you get a fabric that you like, determine the gauge and go on to the next section.
Edges, Edgings, Bands & Closures
Sometimes the stitch pattern itself creates a wonderful top or bottom edge for a cowl, pulling the fabric up like drapes or causing it to zig and zag. Sometimes, a pretty cast-on or bind-off can do double-duty, creating not merely the first or last row of stitches but also edging the top and bottom in an interesting way.
And sometimes the edging is the star of the piece (see Pleated Scarflette on page 54), and the rest merely supports it. In such cases, when an edging abuts a stitch pattern or when two stitch patterns meet, you may need to change the number of stitches on the needle to accommodate the smaller or larger stitch counts required by different pattern repeats. Using a couple rows of garter stitch or reverse stockinette stitch as a transition can camouflage any necessary increases or decreases. You can also add edgings separately by either picking up stitches to work outward, grafting a separately worked piece to live stitches, or sewing.
You can work your selvage stitches (extra stitches at each side of a piece) in a variety of ways: You can slip them or work them in garter stitch or rib, or any other flat pattern that will keep the edge of a rolling fabric flat (see Textured Sampler Cowl on page 46); alternatively, you can work edge stitches in stockinette stitch to deliberately roll the edge of a flat fabric (see Cabled Cowl on page 50).
Similar tricks can be used to create design elements that will separate stitch patterns worked side by side. For example, the patterns in the Lace Sampler are divided by 5-stitch panels that combine 3 stitches of faggoting bordered on each side by 1-stitch purl channels. These panels frame the patterns to focus attention on them.
Finally, use bands and closures to turn rectangular pieces into circular cowls. Buttonholes and bands can close a cowl just like they close a cardigan: pick up stitches on each end and work a rib or garter band; insert buttonholes on one of the bands and sew buttons on the other, and you're done. Or use a feature of the stitch pattern itself as a buttonhole (eyelet and lace patterns need no additional buttonholes!) or to hide a buttonhole (see Cabled Cowl). I-cord ties and button loops can also be added afterward (see Pleated Scarflette) and make it easy to make adjustments for fit.
Revisit your cowl diagram, adding any edgings and closures, and notes on measurements.
Build Your Own Cowl
You've picked out your yarn and made a swatch in your chosen stitch pattern. Now it's time to pull all the pieces together and build your cowl pattern.
Using the same math used for your swatch, convert the inches on your cowl diagram to approximate numbers of stitches and rows.
For example, the Roman Stripe Moebius (see page 44) is 12 inches wide and 40 inches long. The Roman Stripe swatch knits up to 2.5 stitches per inch and 4 rows per inch.
How many stitches should be cast on? 12 inches x 2.5 sts/inch = 30 stitches
How many rows should be worked? 40 inches x 4 rows/inch = 160 rows.
Refine the rough stitch and row numbers to take pattern repeats and balancing stitches into account.
Roman Stripe requires an even number of stitches and has no balancing stitches.
Roman Stripe repeats every 14 rows. To make the pattern repeats match after twisting, we need to work an extra half repeat (7 rows).
160 rows/14 rows per repeat = 11.4 times.
14 rows x 11 repeats = 154 rows + 7 rows (half repeat) = 161 rows
Since knitting stretches and contracts, the extra row won't increase our length significantly.
Add stitches (or rows) for selvages, edgings, bands, and pattern separators or insertions.
There is an extra selvage stitch added on each side, since edge stitches turn to the side, for a total of 32 stitches.
The last half-repeat ends on a Row 5, leaving the grafting row and the cast-on row to act as the 2 knit rows in the middle of the pattern.
Cast on and knit!
Tips
Keep it simple by working your cowl in just one pattern (see Roman Stripe Moebius) or separate the patterns into sections worked one after another (see Textured Sampler Cowl).
Row gauge is crucial when working stitch patterns side by side. Swatch them side by side, or measure very carefully to check rows per inch.
When converting stitch patterns from flat to circular, remember that you will always be working on the right side of the piece. Wrong-side rows must be converted; knits become purls and purls become knits.
Inches must match inches! Edging and band patterns have gauge too, so test them on your main pattern swatch.
Charts are useful visual tools to see changes necessary for converting a flat pattern to circular. It might be as easy as just working all chart rows from right to left.
Have fun. After all, it's just a cowl!
CHAPTER 2The Essential Stitches
In the following section, you'll be introduced to an unlimited combination of stitch patterns that you can make as stand-alone stitch squares to learn new stitches, or you'll have endless hours of enjoyment applying them to the accompanying cowl patterns that begin on page 41. You'll never run out of possibilities.
Roman Lace
Roman Lace (any number of sts)
Note: St count will inc on Rows 1 and 8 and dec back to original count on Rows 3 and 10.
Row 1 (RS): *Yo, k1; rep from * to end.
Row 2: Purl.
Row 3: *K2tog; rep from * end.
Rows 4 and 5: *Yo, k2tog; rep from * to end.
Rows 6 and 7: Knit.
Rows 8–14: Rep Rows 1–7.
Rep Rows 1–14 for pat.
Roman Rib
Roman Rib (even number of sts)
Row 1 (RS): Knit.
Row 2: Purl.
Rows 3 and 4: *K1, p1; rep from * to end.
Row 5: Knit.
Row 6: Purl.
Rows 7 and 8: *P1, k1; rep from * to end.
Rep Rows 1–8 for pat.
Basic Faggoting
Basic Faggoting (even number of sts)
Row 1: *Yo, ssk; rep from * to end.
Rep Row 1 for pat.
Moss Stitch
Moss St (even number of sts)
Rows 1 (RS) and 2: *K1, p1; rep from * to end.
Rows 3 and 4: *P1, k1; rep from * to end.
Rep Rows 1–4 for pat.
Roman Stitch
Roman St (even number of sts)
Rows 1 and 3 (RS): Knit.
Rows 2 and 4: Purl.
Row 5: *K1, p1; rep from * to end.
Row 6: *P1, k1; rep from * to end.
Rep Rows 1–6 for pat.
Seed Stitch
Seed St (odd number of sts)
Note: For even number of sts, skip the last k1 on Row 1.
Row 1: K1, *p1, k1; rep from * to end.
Row 2: Knit the purl sts and purl the knit sts.
Rep Row 2 for pat.
Twisted Rib
Twisted Rib (even number of sts)
All rows: *K1-tbl, p1; rep from * to end.
Linen Stitch
Linen St (multiple of 2 sts + 2)
Rows 1 and 3 (WS): Purl.
Row 2 (RS): K1, *sl 1 pwise wyif, k1; rep from * to last st, k1.
Row 4: K2, *sl 1 pwise wyif, k1; rep from * to end.
Rep Rows 1–4 for pat.
Rosette Stitch
Rosette St (multiple of 2 sts + 2)
Rows 1 and 3 (RS): Knit.
Row 2: *P2tog and leave sts on LH needle, k2tog the same 2 sts and slip from LH needle; rep from * to end.
Row 4: P1, *p2tog and leave sts on LH needle, k2tog the same 2 sts and slip from LH needle; rep from * to last st, p1.
Rep Rows 1–4 for pat.
Threaded Stitch
Threaded St (multiple of 2 sts + 2)
Note: 2 needle sizes are used, one 3 sizes larger than other. Use larger needle to cast on.
Row 1 (RS): With smaller needle, knit.
Rows 2 and 4: With larger needle, purl.
Row 3: With smaller needle, *insert RH needle pwise through first st, knit 2nd st and leave on needle, knit first st tbl, slide both sts off LH needle; rep from * to end.
Row 5: With smaller needle, k1, *insert RH needle pwise through first st, knit 2nd st and leave on needle, knit first st tbl, slide both sts off LH needle; rep from * to last st, k1.
Rep Rows 2–5 for pat.
Fisherman's Rib
Special Abbreviation
Knit 1 in row below (k1b): Insert RH needle kwise into st directly below first st on LH needle and draw up a loop, sl st from LH needle.
Fisherman's Rib (multiple of 2 sts + 3)
Row 1 (RS): K1, *p1, k1; rep from * to end.
Row 2: P1, *k1b, p1: rep from * to end.
Row 3: K1, *p1, k1b; rep from * to last 2 sts, p1, k1.
Rep Rows 2 and 3 for pat.
Cluster
Cluster (multiple of 4 sts)
[Row 1 (RS): *K3tog, (p1, k1, p1) in next st; rep from * to end.
Row 2: *K3, p1; rep from * to end.
Row 3: *K1, p3; rep from * to end.
Row 4: Knit.
Row 5: *(P1, k1, p1) in next st, k3tog; rep from * to end.
Row 6: *P1, k3; rep from * to end.
Row 7: *P3, k1; rep from * to end.
Row 8: Knit.
Rep Rows 1–8 for pat.
Double Seed Stitch
Double Seed St (multiple of 4 sts)
Rows 1 and 2: *K2, p2; rep from * to end.
Rows 3 and 4: *P2, k2; rep from * to end.
Rep Rows 1–4 for pat.
Check
Check (multiple of 4 sts + 2)
Row 1 (RS): K2, *p2, k2; rep from * to end.
Row 2: P2, *k2, p2; rep from * to end.
Rows 3 and 4: Knit.
Row 5: Rep Row 2.
Row 6: Rep Row 1.
Rows 7 and 8: Knit.
Rep Rows 1–8 for pat.
Cross-Stitch Rib
Cross-Stitch Rib (multiple of 4 sts +2)
Row 1 (RS): P2, *skip first st, knit 2nd st, then knit first st, slip both sts from needle, p2; rep from * to end.
Row 2: K2, *p2, k2; rep from * to end.
Rep Rows 1 and 2 for pat.
Swedish Check
Swedish Check (multiple of 4 sts + 2)
Rows 1 and 5 (RS): Knit all sts tbl.
Rows 2 and 6: Purl.
Row 3: K2-tbl, *p2, k2-tbl; rep from * to end.
Row 4: P2, *k2, p2; rep from * to end.
Row 7: P2, *k2-tbl, p2; rep from * to end.
Row 8: K2, *p2, k2; rep from * to end.
Rep Rows 1–8 for pat.
Trinity Stitch
Trinity St (multiple of 4 sts + 2)
Rows 1 and 3 (RS): Purl.
Row 2: K1, *(k1, p1, k1) in next st, p3tog; rep from * to last st, k1
Row 4: K1, *p3tog, (k1, p1, k1) in next st; rep from * to last st, k1.
Rep Rows 1–4 for pat.
(Continues...)
Excerpted from Plug & Play Cowls by Annie's. Copyright © 2014 Annie's. Excerpted by permission of Annie's.
All rights reserved. No part of this excerpt may be reproduced or reprinted without permission in writing from the publisher.
Excerpts are provided by Dial-A-Book Inc. solely for the personal use of visitors to this web site.
Table of Contents
Contents
Pattern Services and Revisions,The Essential Stitches,
Plug & Play Cowls,
General Information,